


What Is Lalicat?
Lalicat is an anti-detection browser that helps users manage multiple online profiles securely and anonymously. It allows for extensive customization of browser fingerprints to prevent tracking and detection across different websites. This browser is particularly useful for activities such as social media management, affiliate marketing, and any other task that requires maintaining multiple discrete online identities.
Why Use Proxies in Lalicat Browser?
Using proxies in Lalicat Browser is crucial for those who want to earn money by managing multiple online profiles. Proxies help hide your real IP address and make each account appear as if it’s operating from a different location. This not only increases privacy, but also significantly reduces the risk of account bans on platforms that restrict multiple account operations. By using proxies, you ensure that each profile maintains a unique digital footprint, which is essential for successful operations in activities such as affiliate marketing or social media management.
Setting Up a Proxy in the Lalicat Browser
Lalicat is an anti-detect browser designed to ensure anonymity and safeguard your online activities. It allows for the use of proxy servers to route your internet traffic, keeping your presence anonymous while enabling you to bypass geographical restrictions and avoid IP-based blocks.
This article provides a detailed, step-by-step guide on configuring proxies in Lalicat to enhance your data security.
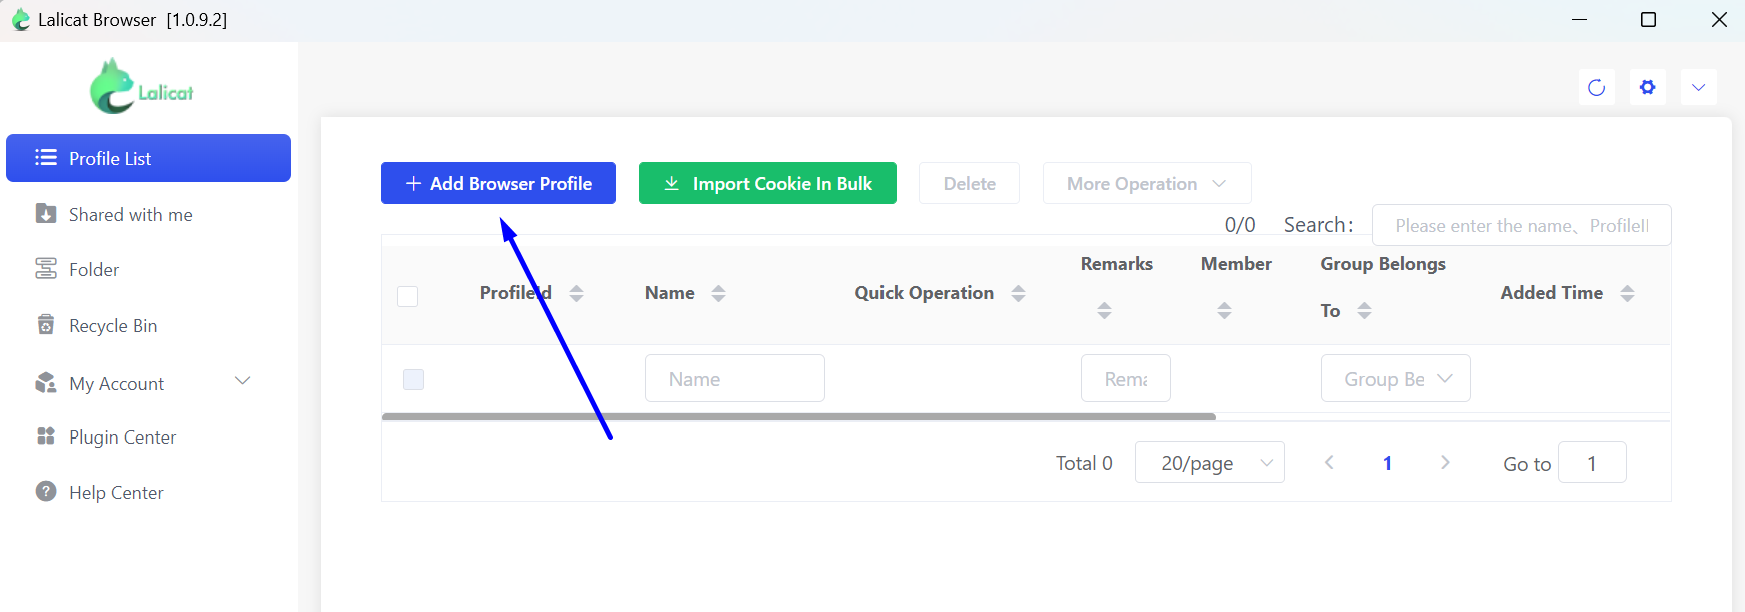
Step 1: Create a Profile
Launch the Lalicat browser and click on the “+ Add Browser Profile” button.
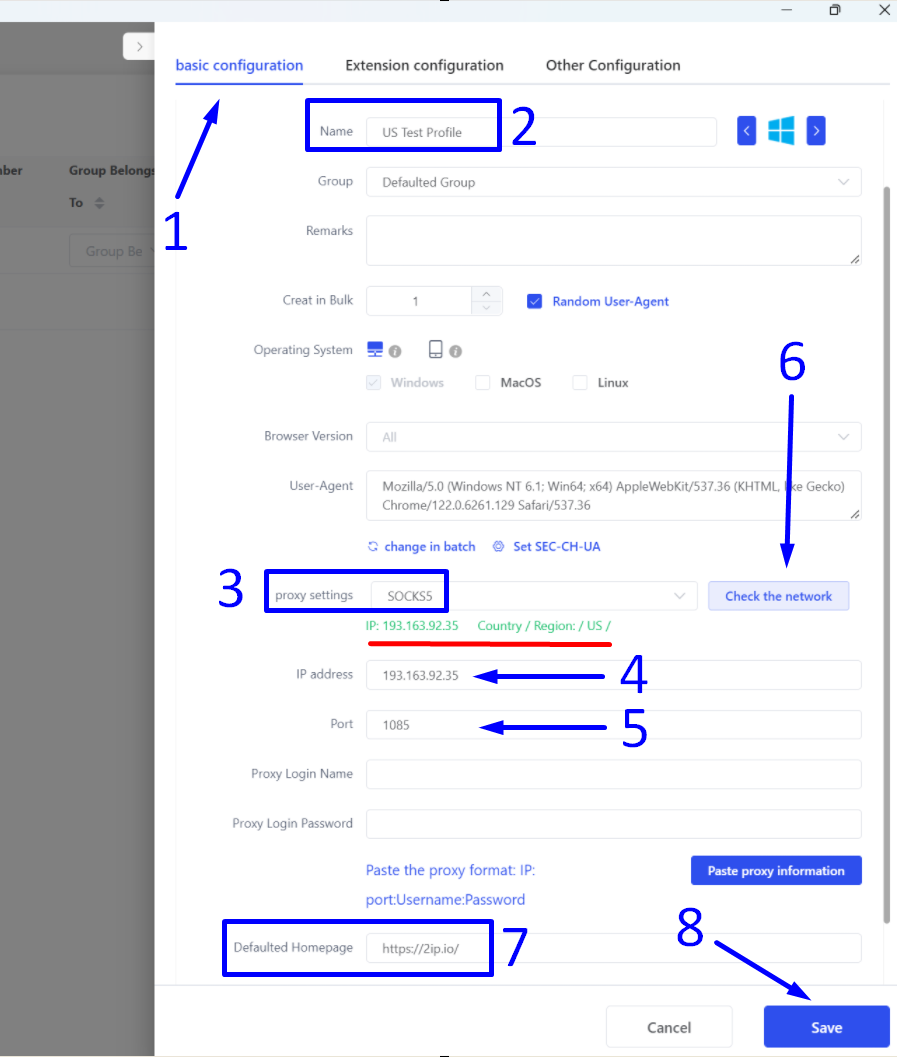
Step 2: Add a SOCKS5 Proxy to the Lalicat Profile
In the settings of your new Lalicat browser profile, do the following:
- Go to the “Basic Configuration” tab.
- Enter a name for your new profile.
- In the “Proxy Settings” field, select the protocol for your proxy. If you have a choice, we recommend using the SOCKS5 protocol, as it is the most anonymous and versatile.
- Enter the IP address of the proxy.
- Enter the proxy port. In our case, it is port 1085, which does not require a username and password. Therefore, leave the “Proxy Login Name” and “Proxy Login Password” fields empty.
- Click the “Check the network” button to test the proxy. If successful, you will see a green label indicating the geolocation of your proxy. In our case, it should show the USA (highlighted in red on the screenshot).
- Enter the start page that your new profile will load first.
- Save the profile by clicking the “Save” button.
Now your new profile is ready for use. You can start working with the Lalicat anti-detect browser and the SOCKS5 proxy server, which will replace your real IP address.
