


Antik Browser is an elegantly designed anti-detect browser with a simple interface, perfect for securely managing multiple online accounts with complete anonymity. It is well suited for platforms such as Facebook, Google, and Tik-Tok, and is especially beneficial for users of betting sites, crypto exchanges, and in arbitrage activities.
The browser is compatible with macOS (Intel), macOS (M1), and Windows, and offers advanced features such as the ability to create and customize digital fingerprints for each platform, and the ability to share them with other Antik users.
The integration of proxy servers in the Antik browser significantly enhances user privacy and security, a critical feature when dealing with multiple accounts. This is because security systems are very good at identifying and blocking profiles associated with a single IP address. Thus, using proxies in Antik Browser is a robust solution for secure operation of multiple accounts.
Next, we will guide you through the process of correctly configuring proxies within Antik Browser to maximize your operational security and efficiency.
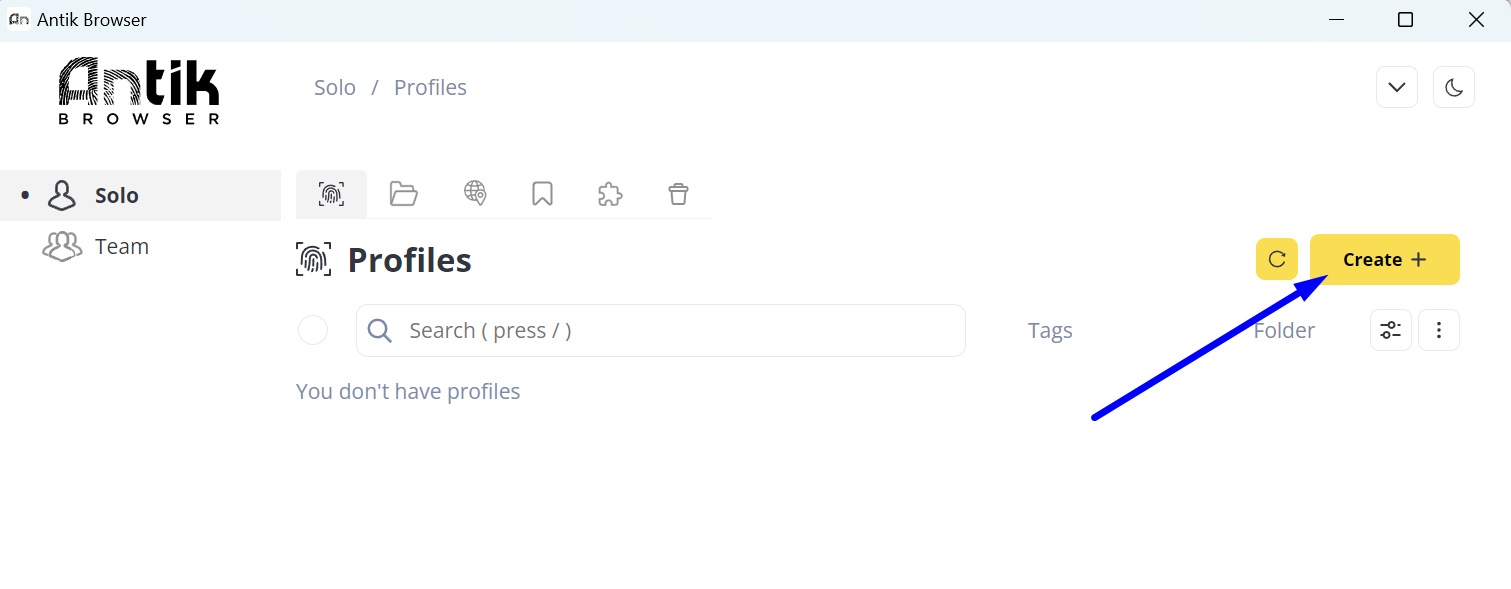
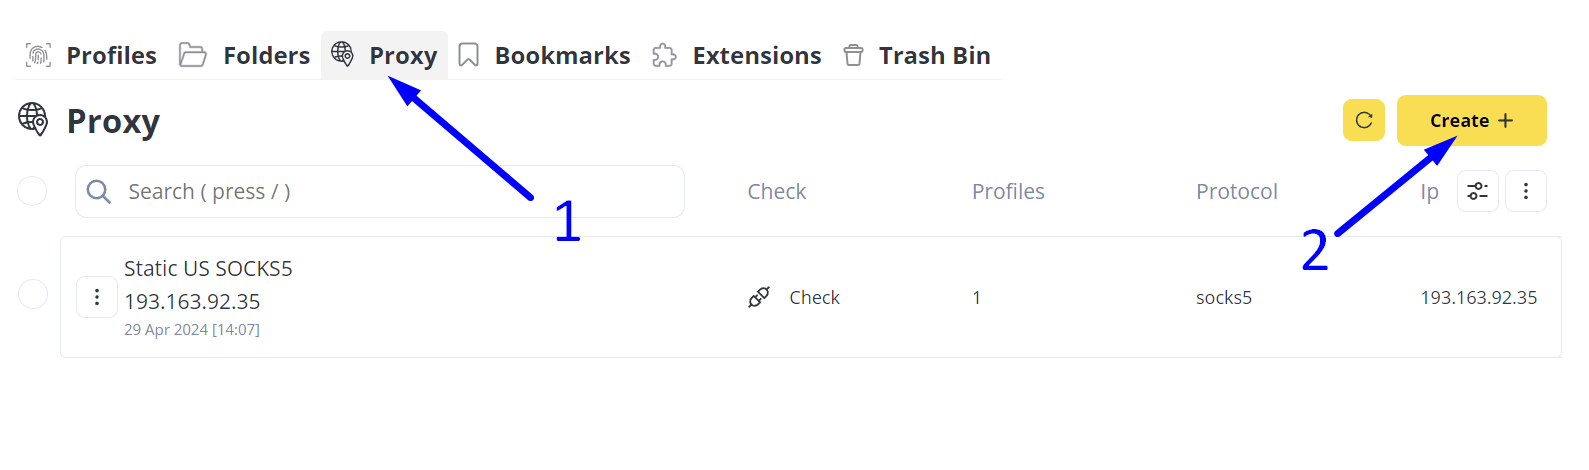
Step 1: Adding a New Profile in Antik Browser
Initially, you need to add at least one profile to Antik Browser. To do this, click the “Create +” button.
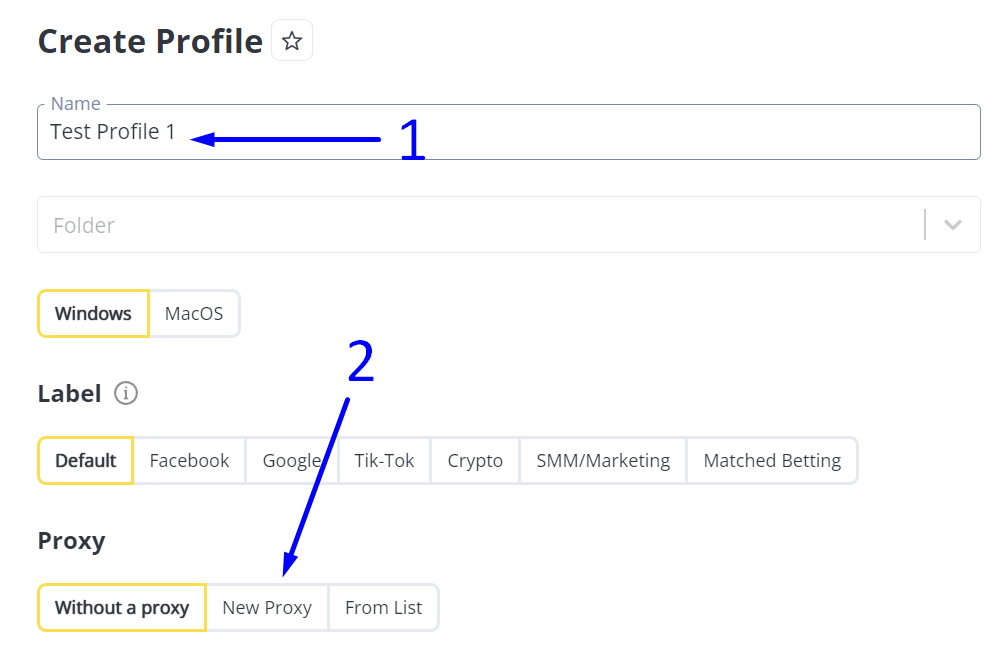
Step 2: Creating a Profile with a New Proxy
In the section that appears:
- Enter the name of your new profile.
- Click the “New Proxy” button.
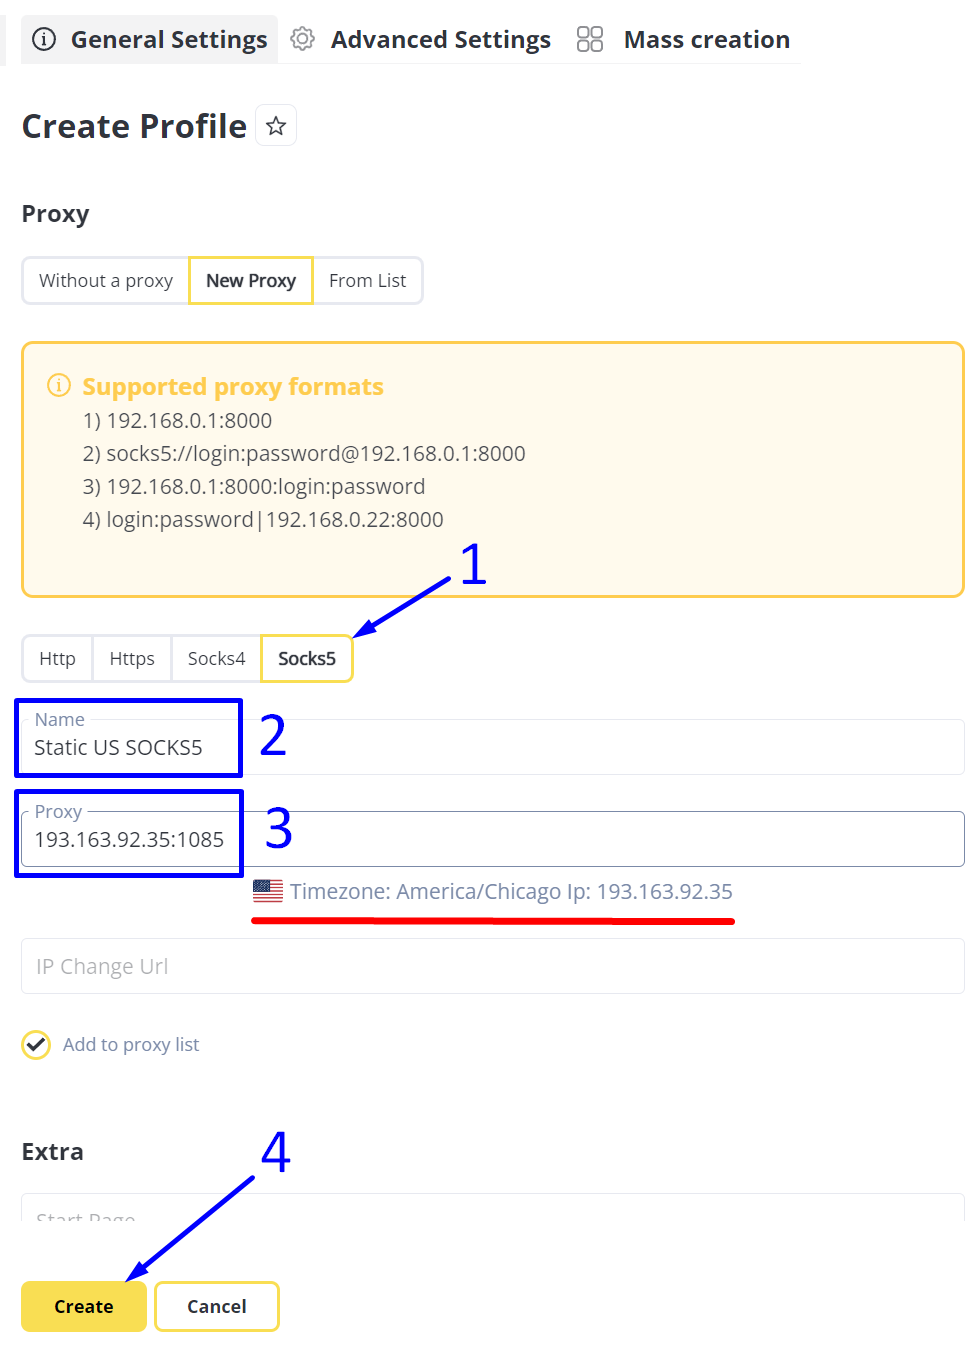
Step 3: Adding a Proxy
We recommend using a SOCKS5 proxy whenever possible, as it is the most anonymous and versatile protocol.
- Select SOCKS5 by clicking the corresponding button.
- Enter the name of this proxy, for example, “Static US SOCKS5“. Read more about static proxies.
- Enter the IP and port of the proxy in any of the formats shown on the screenshot. In our case, it is sufficient to enter it in the IP:Port format without specifying a Username and Password.
After entering the proxy data, the Antik browser will automatically check the correctness of the data and the availability of the proxy. If everything is correct, a label will appear with the flag of the proxy’s country and its geolocation (highlighted in red on the screenshot).
. - Click the “Create” button to save the profile and its proxy.
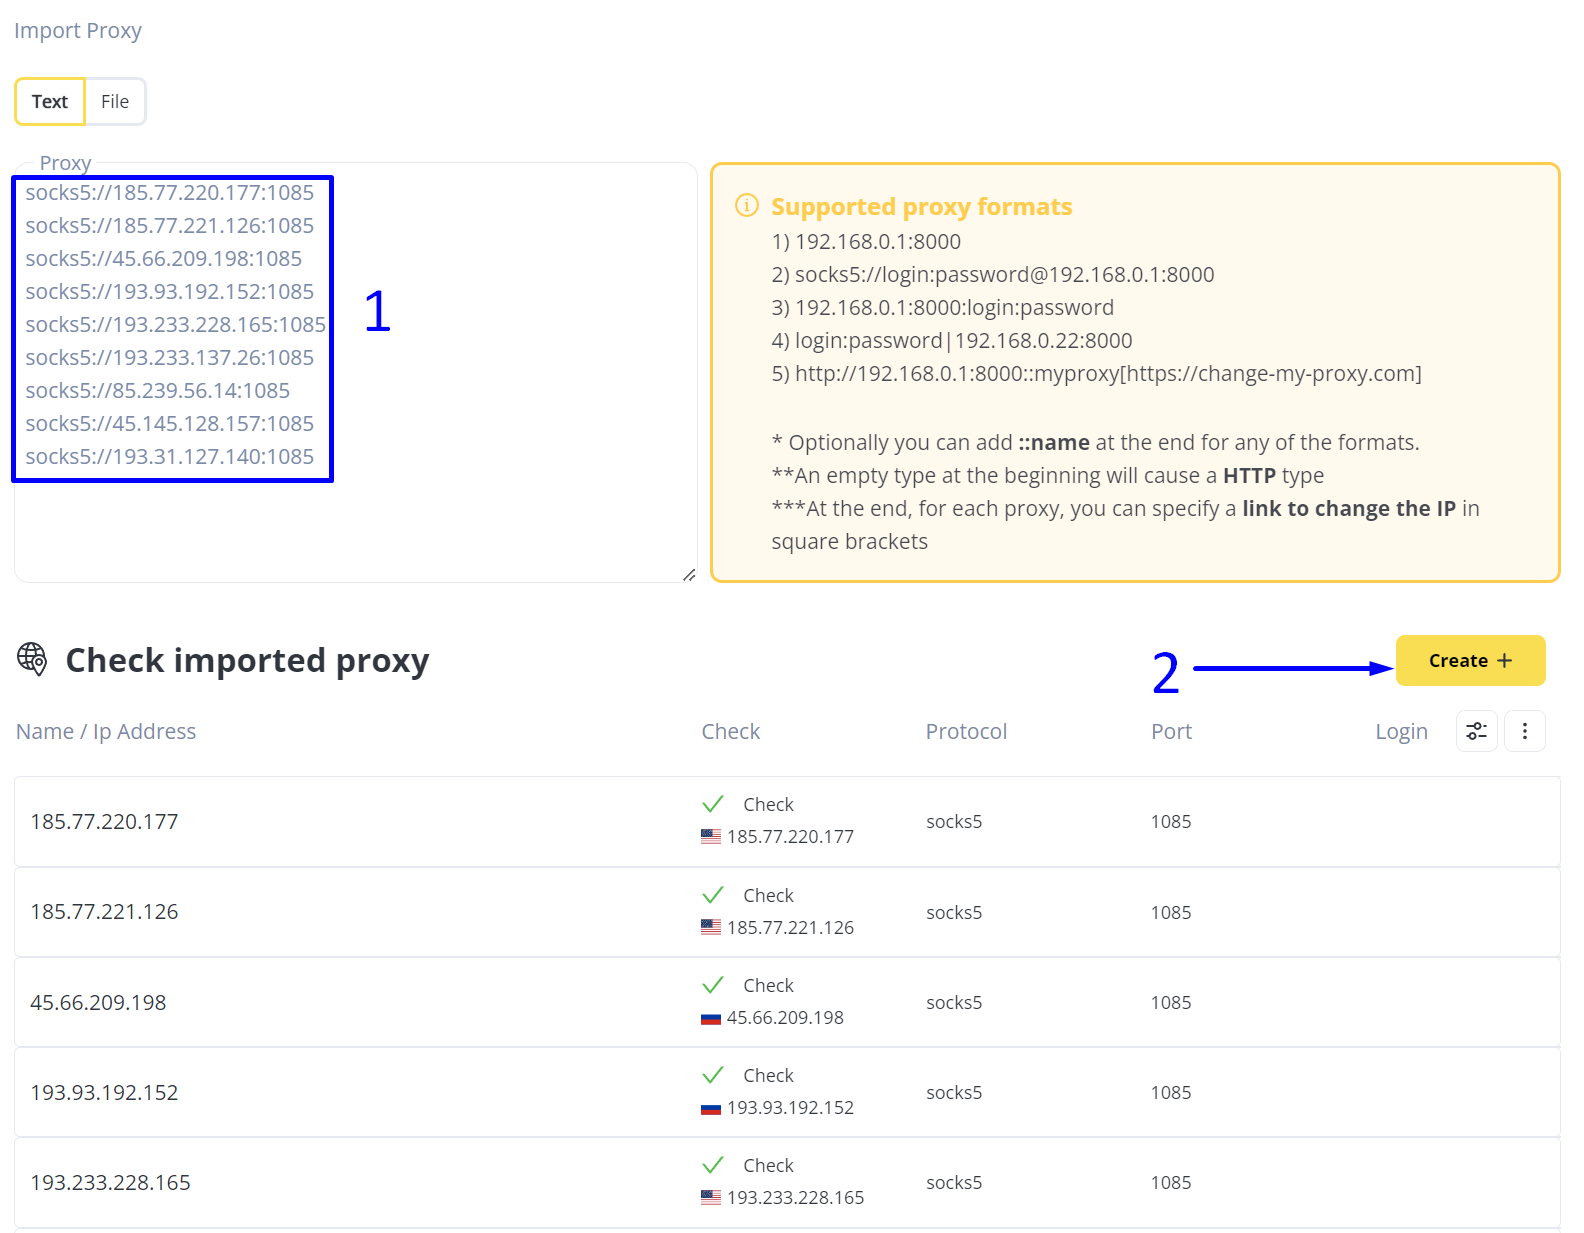
Step 4: Bulk Adding a Proxy List
Step 5: Uploading the Proxy List
For bulk addition of proxy lists, you need to prepare them for import by formatting them properly.
In our case, we want to add 9 proxy servers that operate on the SOCKS5 protocol and do not require username and password authorization. Therefore, we will use the format:
socks5://ip-address:port
We formatted our proxy list for import into Antik Browser as follows:
socks5://185.77.220.177:1085
socks5://185.77.221.126:1085
socks5://45.66.209.198:1085
socks5://193.93.192.152:1085
socks5://193.233.228.165:1085
socks5://193.233.137.26:1085
socks5://85.239.56.14:1085
socks5://45.145.128.157:1085
socks5://193.31.127.140:1085
Moving on:
- This list can be saved in a text file for import, or simply copied and pasted into the appropriate “Proxy” field.
- Then, click on the yellow “Create +” button to complete the import.
The result of importing proxies into Antik Browser
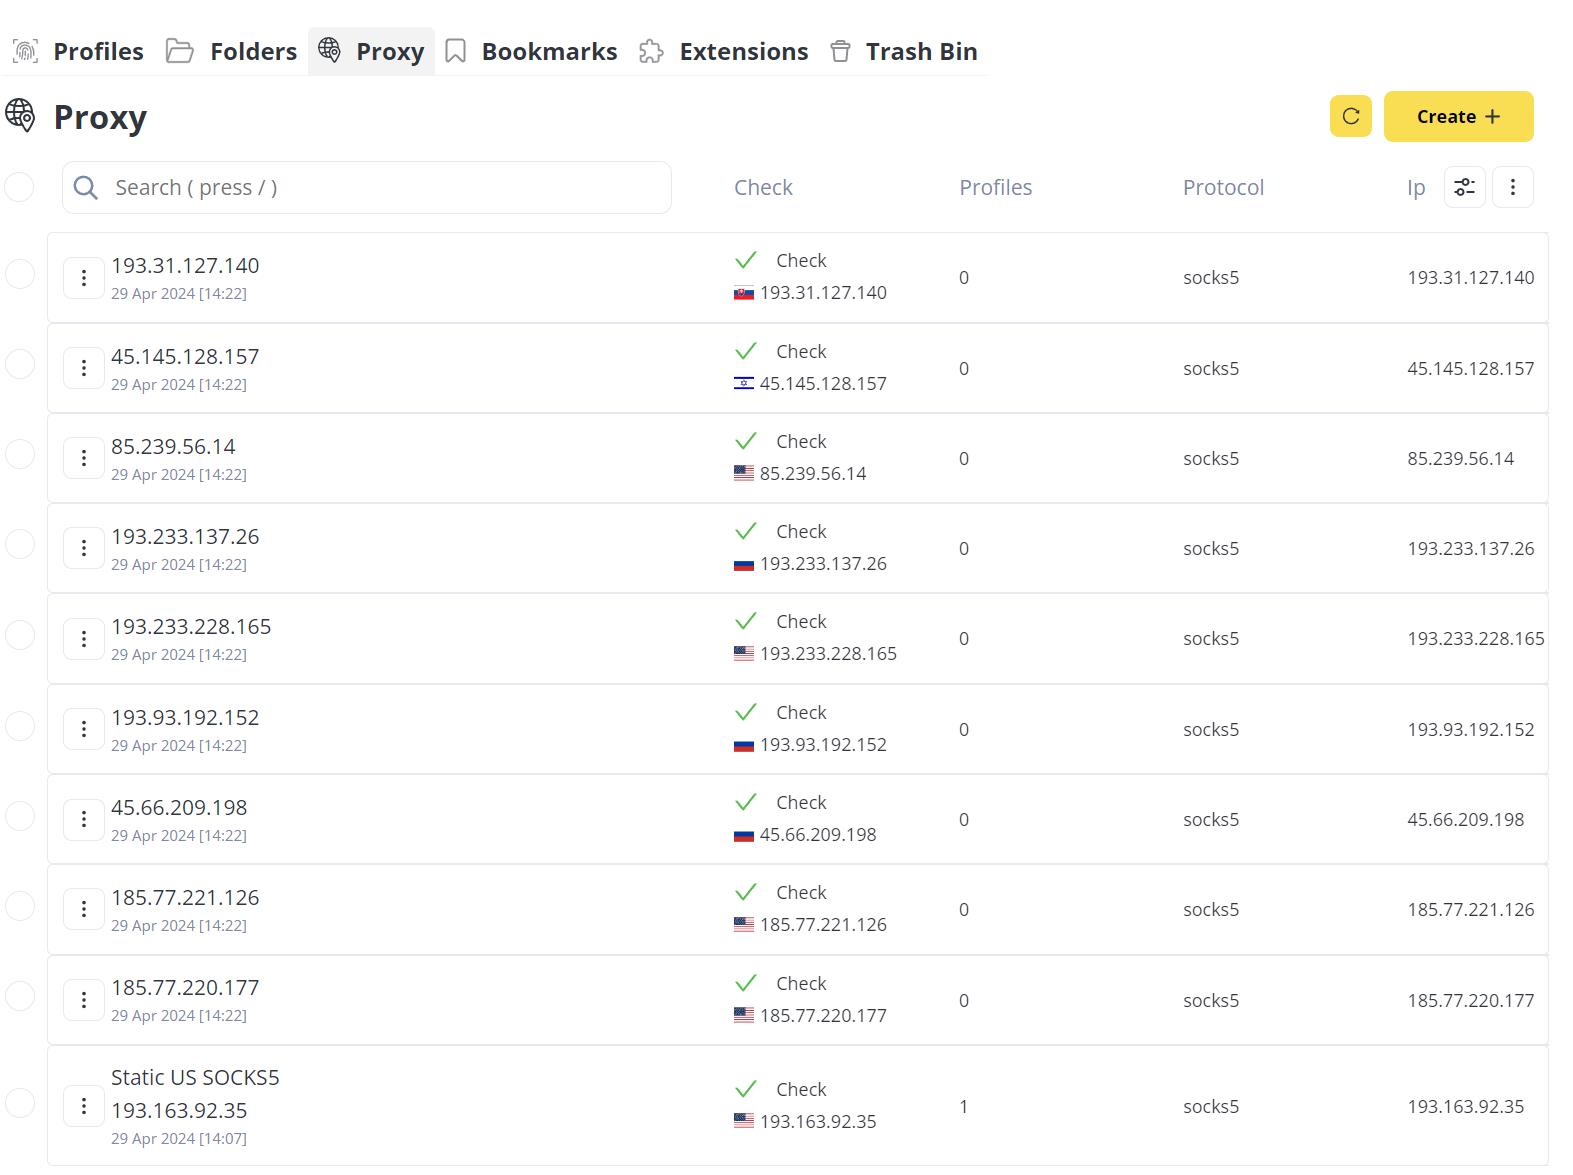
The addition of proxy servers to Antik Browser is complete. The proxies are now ready to be assigned to the relevant profiles.
