


The MoreLogin browser secures account and user data using digital fingerprint technology. It supports both Windows and Mac OS devices. As an anti-detect browser, MoreLogin allows secure management of multiple accounts on a single device, presenting each profile as a new device.
It provides API automation integration for tasks related to opening or creating configuration files. Designed to provide an extra layer of anonymity and protection against user identification and tracking online, the highest level of security in MoreLogin can be achieved through proxy settings.
Installing a proxy server in the browser allows access to blocked resources, secures personal information and data, and facilitates testing of websites and applications.
In this guide we will show you different ways to add proxies to MoreLogin browser.
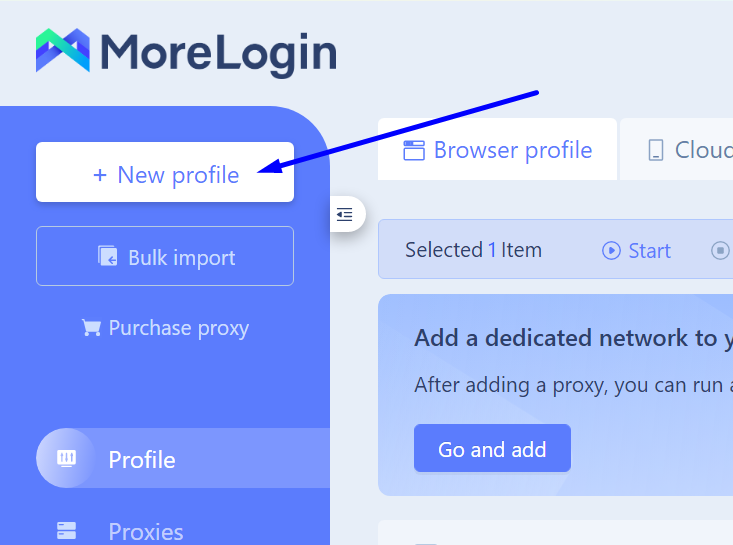
Step 1: Create a New Profile
First you need to create a new profile. To do this, click the “+ New Profile” button. We will do this twice to create two profiles to demonstrate adding two different types of proxies for each profile: a static proxy and a rotating proxy.
Step 2: Adding a New Proxy to the Profile
To add a proxy to an already created profile, without leaving the “Profile” section, click on the pencil icon in the “Proxy” column next to the selected profile.
In our example below, it is the Static Profile.

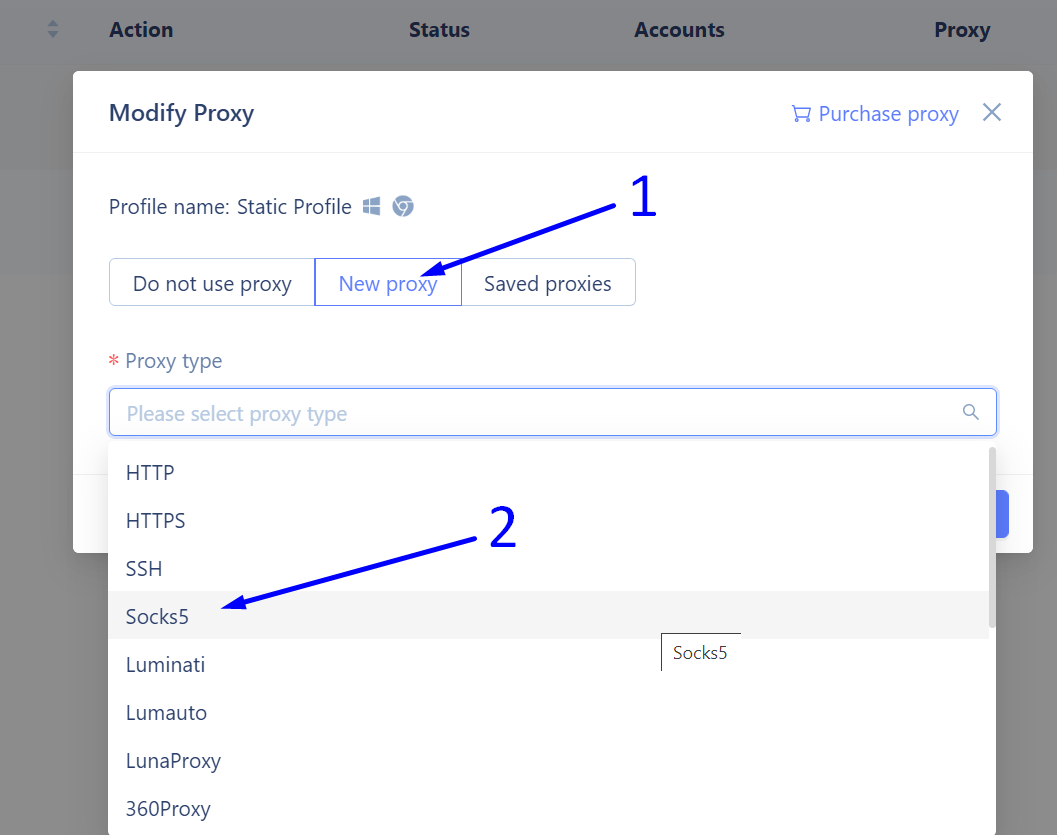
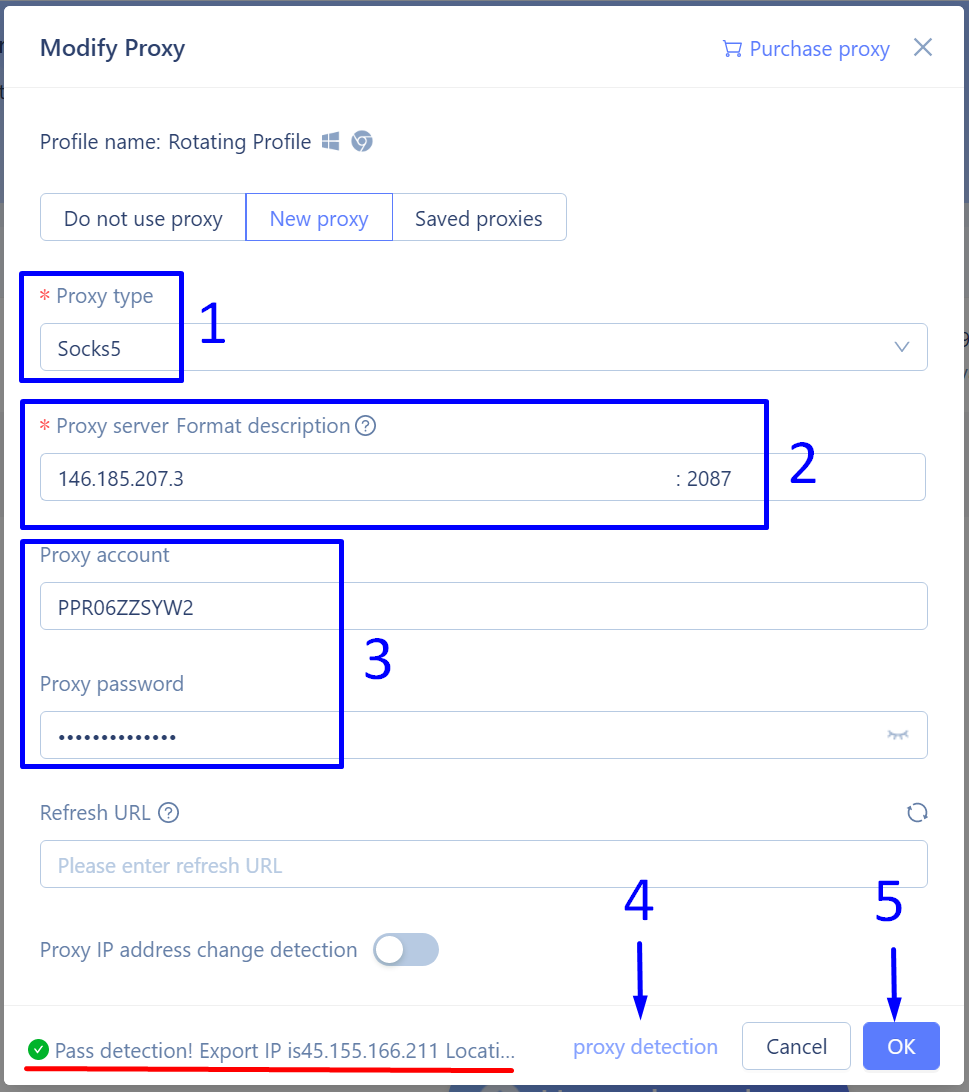
After clicking on the pencil icon, a settings window for this profile will open, labeled “Modify Proxy“.
In this window, you need to:
- Click on the “New proxy” label.
- Select the protocol for the proxy you are adding. We choose the Socks5 protocol as the most versatile and anonymous option available.
Szenario 1: Add a Static SOCKS5 Proxy
Moving forward, we want to set up a proxy that has a constant IP address, so that all actions performed using the MoreLogin profile occur under the same static IP address.
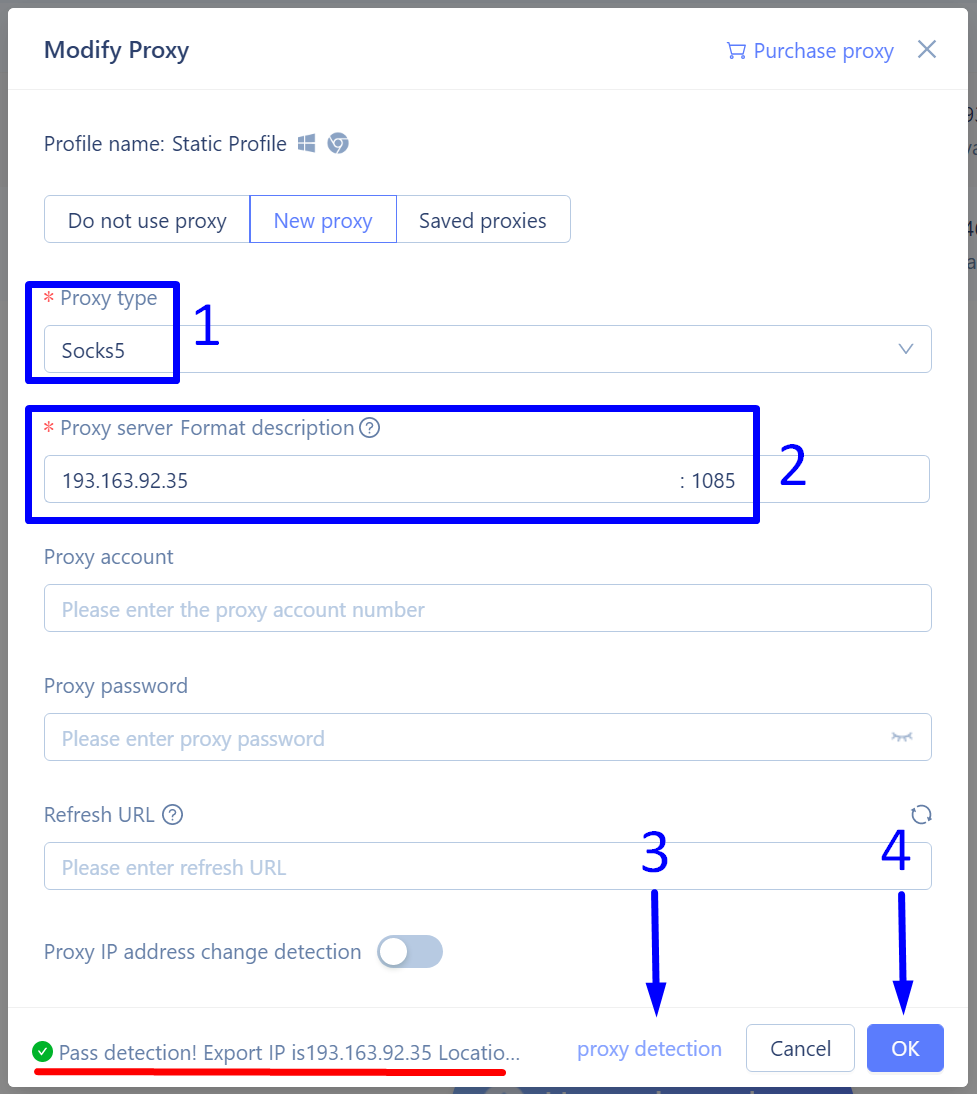
- Choose the “Socks5” protocol.
- Enter the IP address of our static proxy and its port. For ProxyCompass service users, this is always port 1085. It does not require a Username and Password, so we will leave these fields blank.
- At the bottom of the window, click on “proxy detection“. The MoreLogin browser will check the connection with this proxy. If everything is in order and the proxy is accessible, the message “Pass detection! export IP is …” will appear, highlighted in red on our screenshot.
- Save the changes by clicking the “OK” button.
Scenario 2: Add a Rotating SOCKS5 Proxy
This scenario with MoreLogin involves having a profile with a constantly changing IP address. One way to implement this scenario is by adding a large list of different proxy servers. However, this method is not very convenient. A much simpler way to ensure a constant change of IP address is by adding a single rotating proxy.
To add a rotating proxy to the MoreLogin browser profile settings, you need to:
- Specify the protocol used for connecting to the proxy. Choose Socks5.
- In the “Proxy server Format description” field, enter the IP address of the rotating gateway and its port. This gateway will serve as a constant source of new IP addresses. Our gateway is 146.185.207.3, and our port is 2087.
- In the “Proxy account” section, enter your Username and Password to access the rotating gateway.
- Click on “proxy detection”. The MoreLogin browser will check the connection with this gateway and display the first random IP address from the rotating proxy. If everything is correct and the proxy is accessible, the message “Pass detection! export IP is …” will appear, highlighted in red on our screenshot.
- Save the changes by clicking on “OK”.
Szenario 3: Add Proxies in Bulk
In the event that you are using a large number of profiles in the MoreLogin browser and wish to assign a dedicated IP address to each of these profiles, you will need to enter a large number of proxy servers. The most convenient way to do this is through the special bulk addition feature. To upload your list of proxies, you first need to prepare the list in the required format.
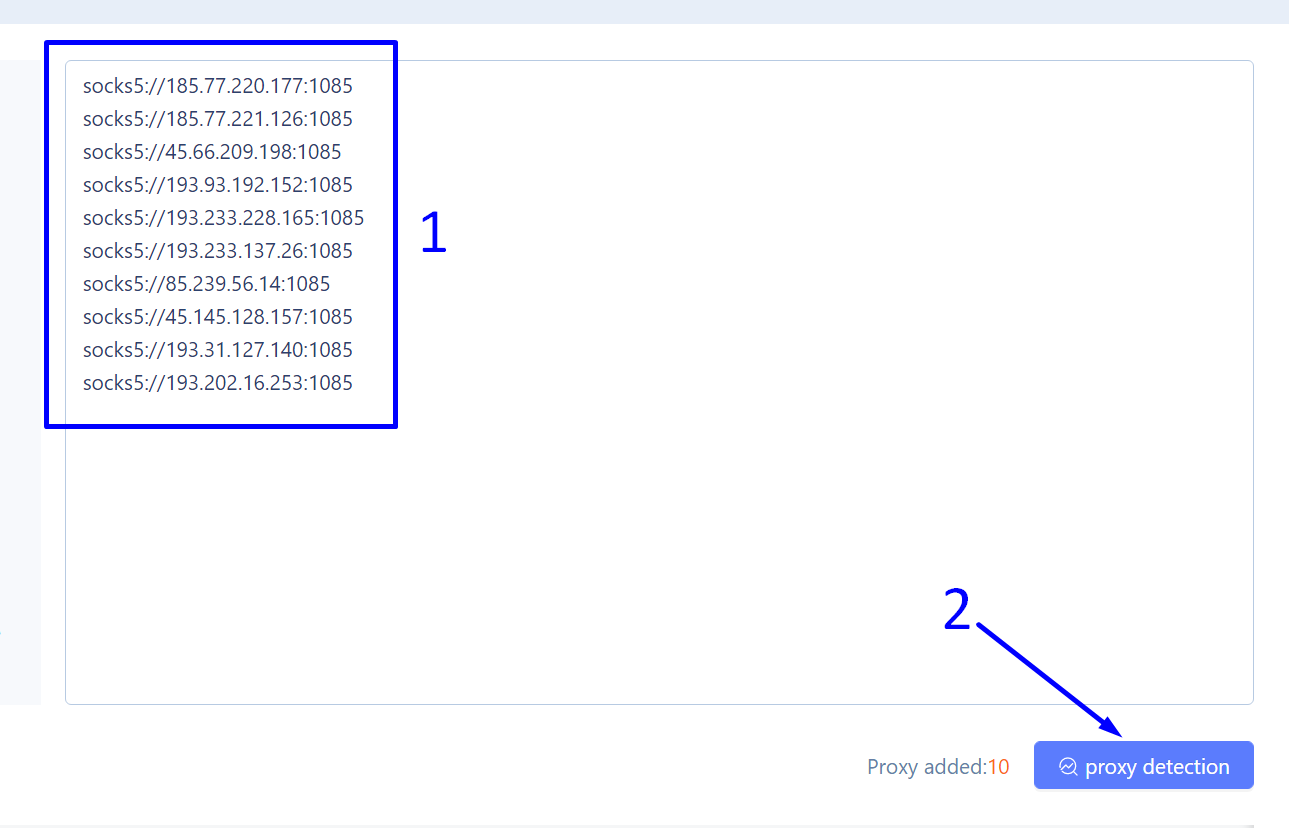
In our case, we are using SOCKS5 proxies, which do not require authentication by Username and Password, so we use the format: socks5://ip:port. Our proxy list will look like this:
socks5://185.77.220.177:1085
socks5://185.77.221.126:1085
socks5://45.66.209.198:1085
socks5://193.93.192.152:1085
socks5://193.233.228.165:1085
socks5://193.233.137.26:1085
socks5://85.239.56.14:1085
socks5://45.145.128.157:1085
socks5://193.31.127.140:1085
socks5://193.202.16.253:1085
Next:
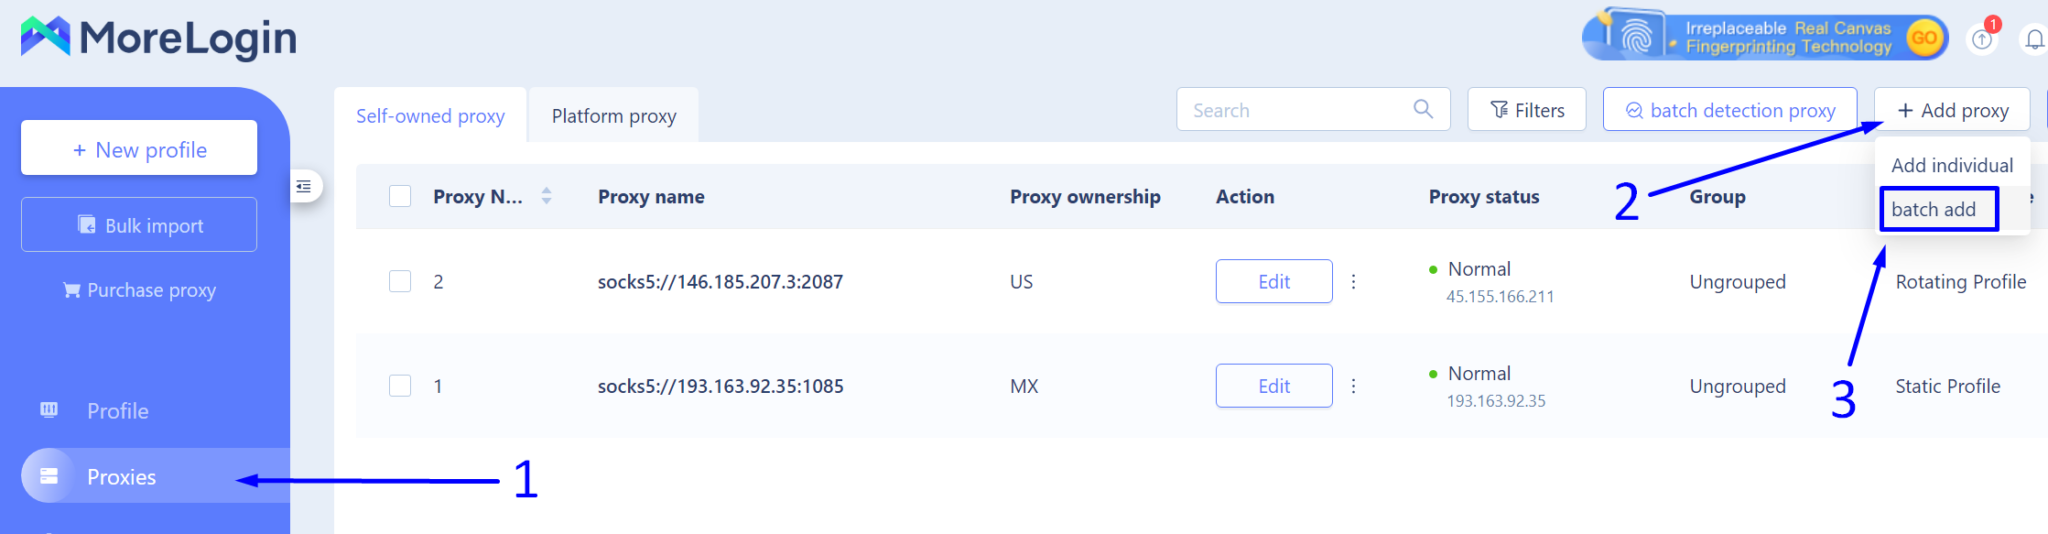
- Click on the “Proxies” section located on the left side of the browser screen.
- In the top right corner, click on the “+ Add proxy” button.
- From the dropdown menu, select the “batch add” option.
Next, in the window that appears:
- Paste the previously copied list of our proxies into the appropriate field.
- Click the “proxy detection” button to bulk check the connection with our proxy servers.
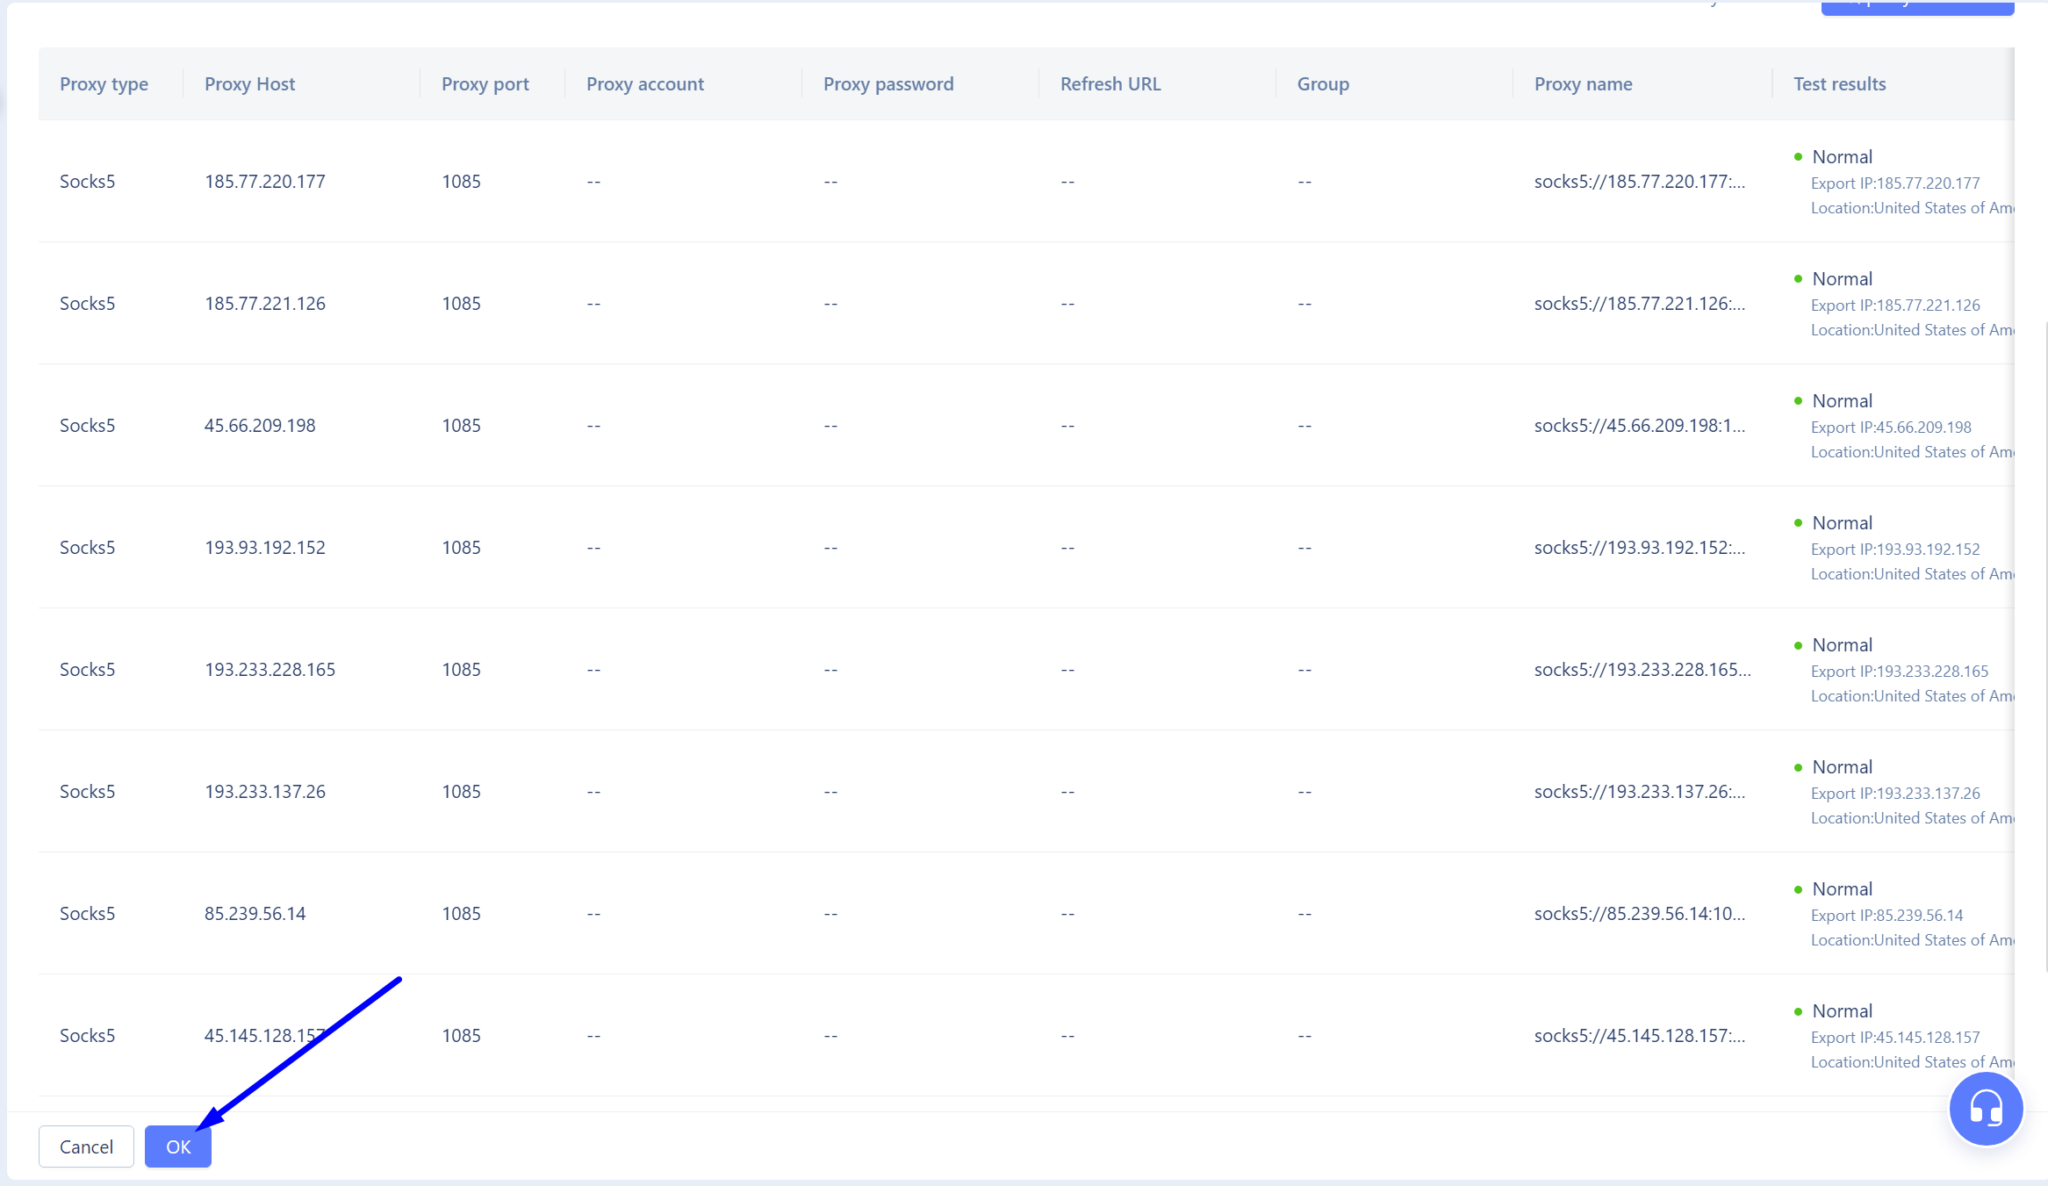
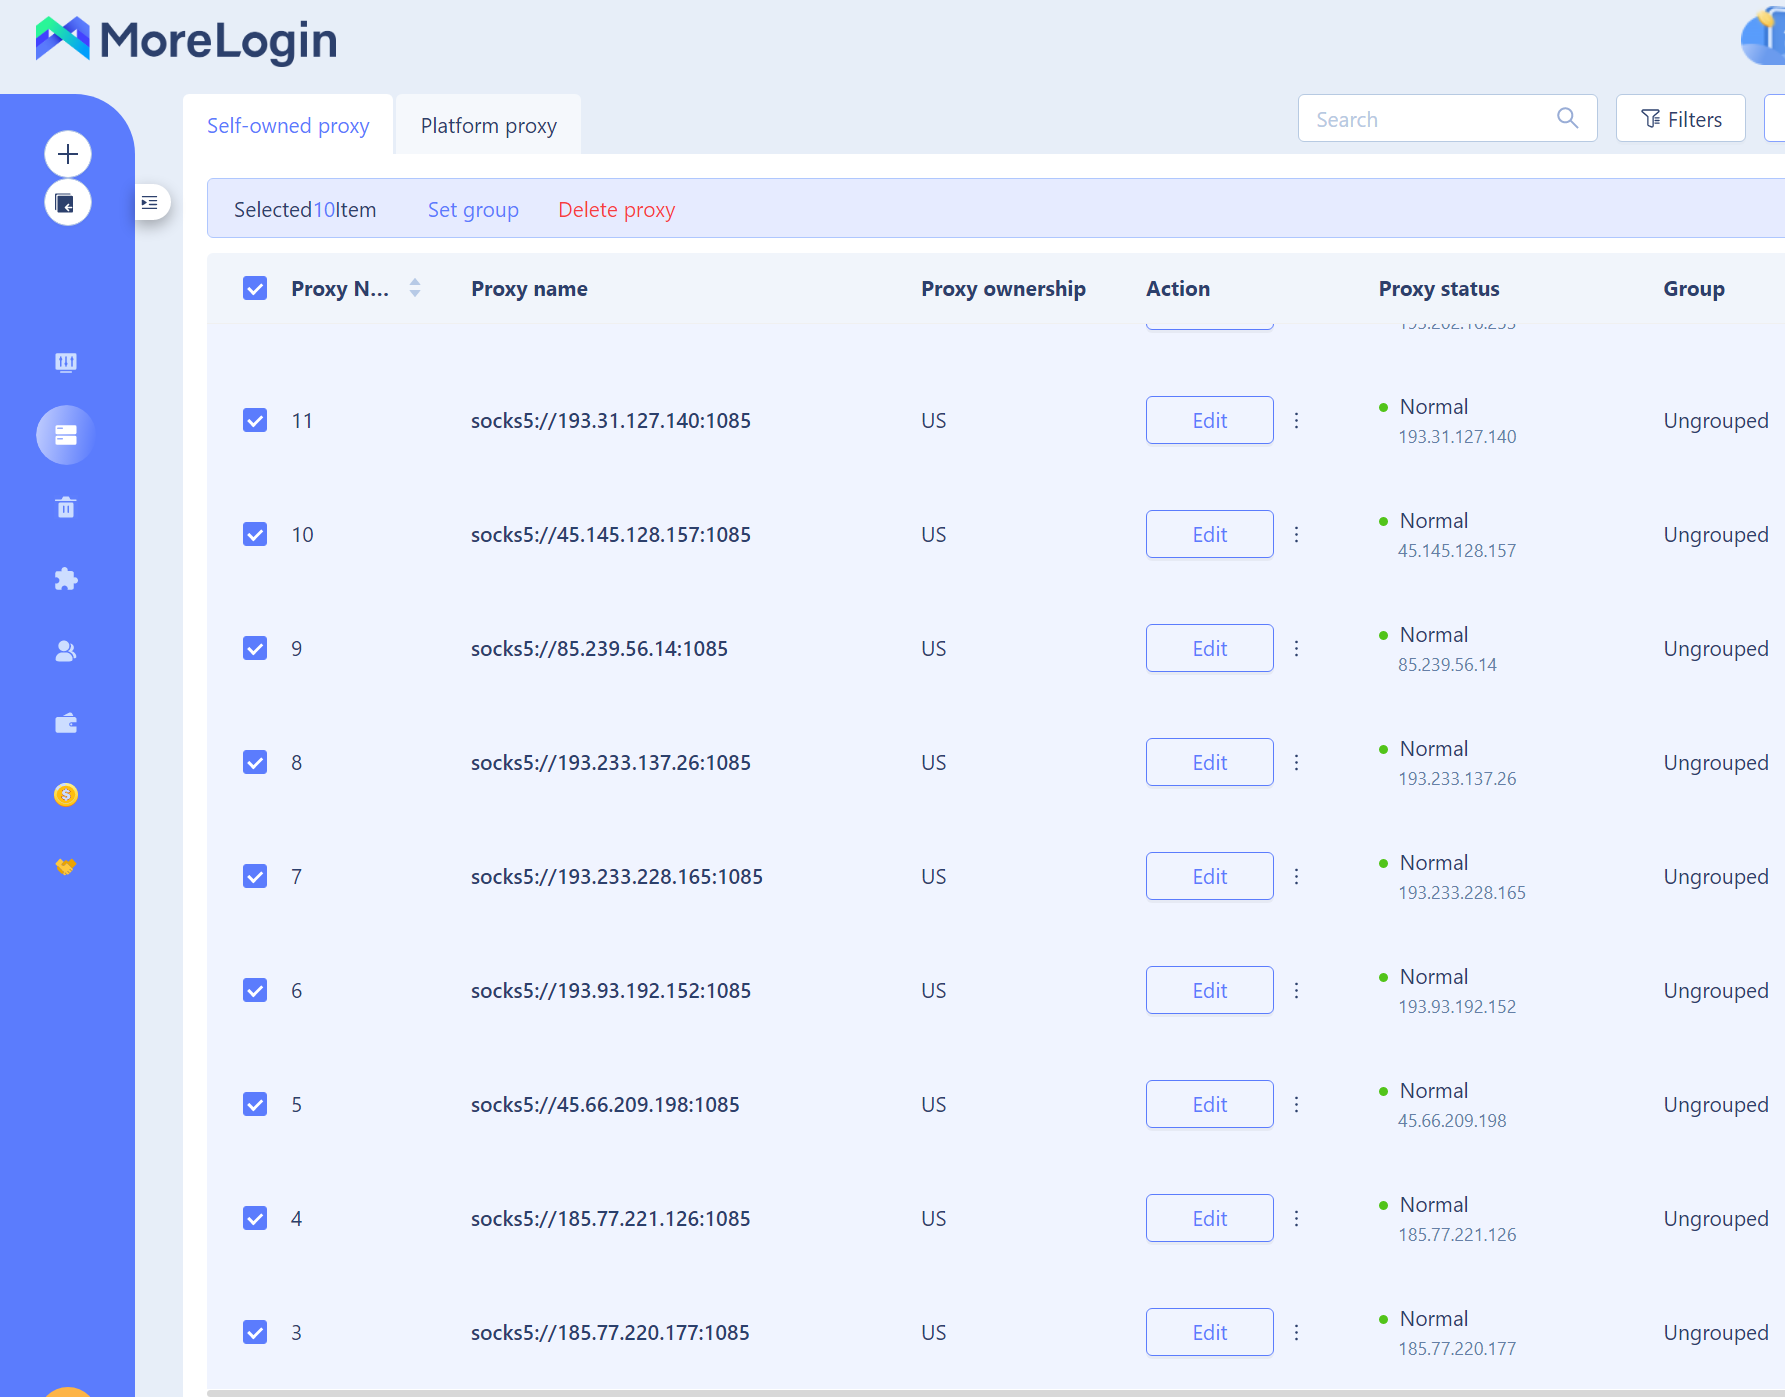
The MoreLogin browser begins checking the connection with each proxy from our list. If the check is successful, the results for each proxy appear in the far right column, showing a status of “Normal” and the geolocation of that proxy.
Everything is in order. Complete the proxy import by clicking the “OK” button.
Proxy Addition Results
In the screenshot below, we see the result of successfully adding a group of proxies. Now, the only remaining step is to link each browser profile with the required proxy server.
All is set up correctly. Now, each profile will operate under its own IP address. This will prevent potential negative consequences for all profiles if one of them gets banned on your target site.
