

Hidemyacc is a sophisticated anti-detect browser built on the Chromium platform and designed specifically for multi-account management. It facilitates the creation of unique digital fingerprints, making it ideal for online marketing, web analytics, cryptocurrency trading, and other activities that require multiple accounts.
Compatible with both Windows and MacOS, Hidemyacc allows users to create an unlimited number of accounts while providing advanced proxy server configurations for enhanced privacy and security.
Next, we will demonstrate the proper methods for integrating this browser with proxy servers using real-world examples.
Step 1: Create a New Profile
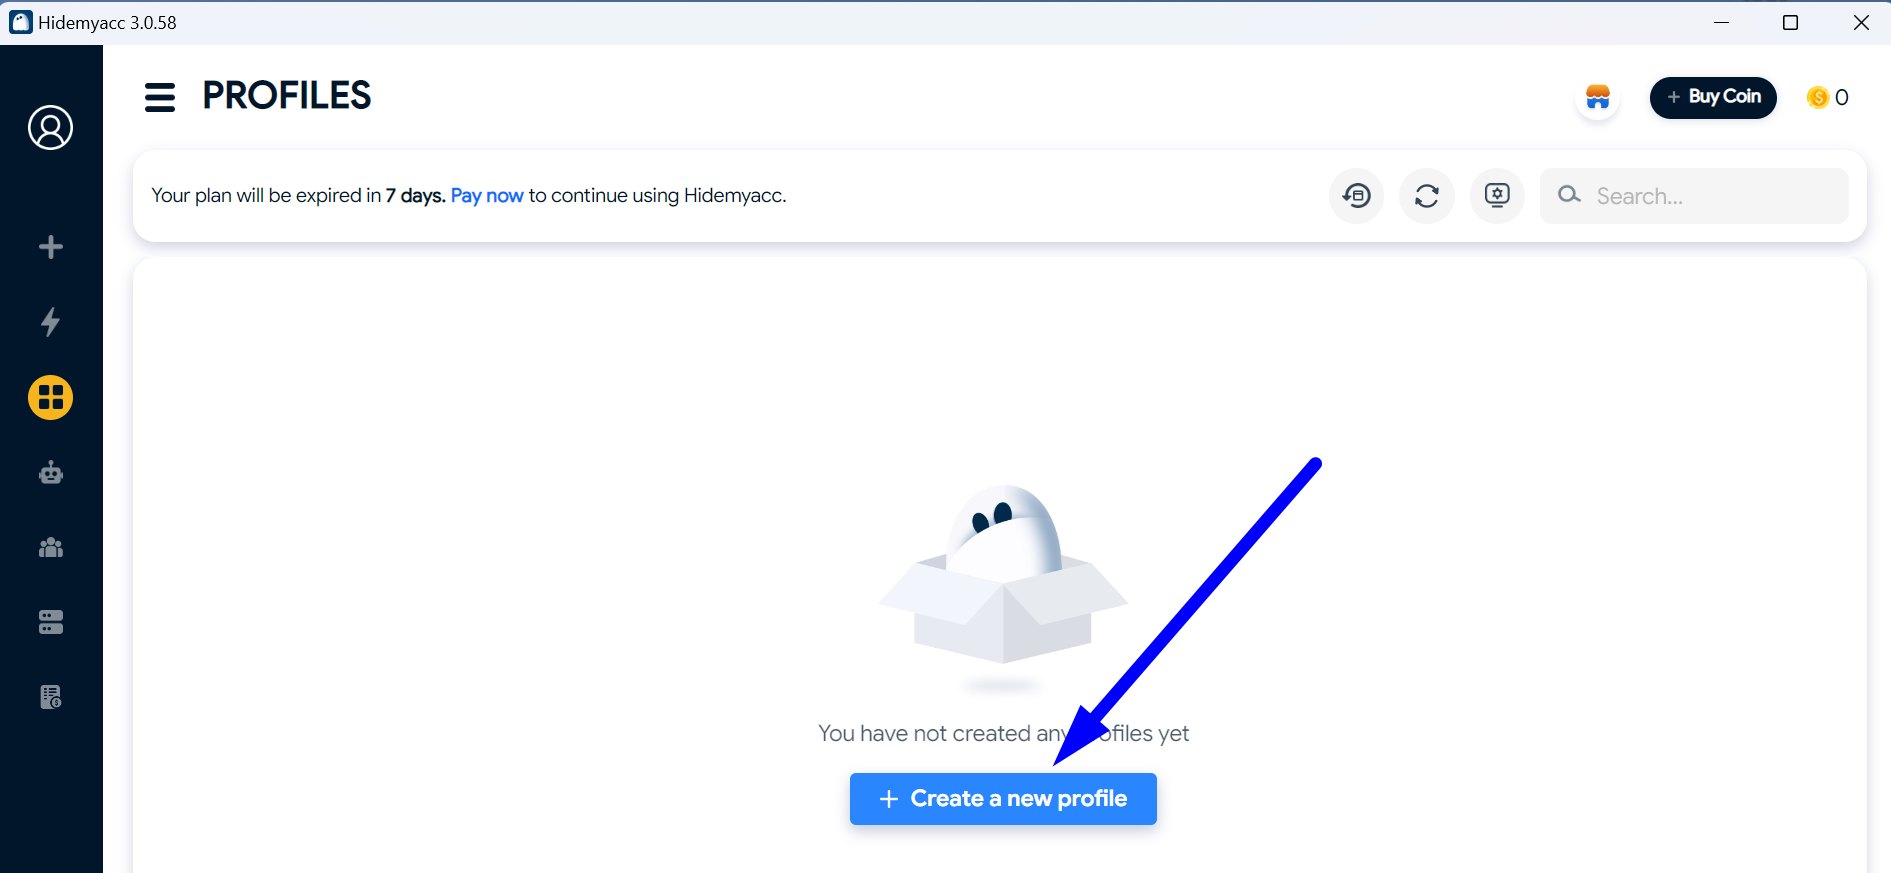
Initially, you need to create a profile. Click on the “+ Create a new profile” button to get started.
Scenario 1: Creating a Profile with a Static Proxy
The most typical use case for the Hidemyacc browser is managing multiple online accounts simultaneously for activities such as online marketing or social media management.
In such scenarios, using a static proxy is essential to maintain consistent IP addresses, ensuring that each account appears to operate from a unique and stable location, thereby reducing the risk of detection and bans.
To add a static proxy to a Hidemyacc profile, follow these steps:
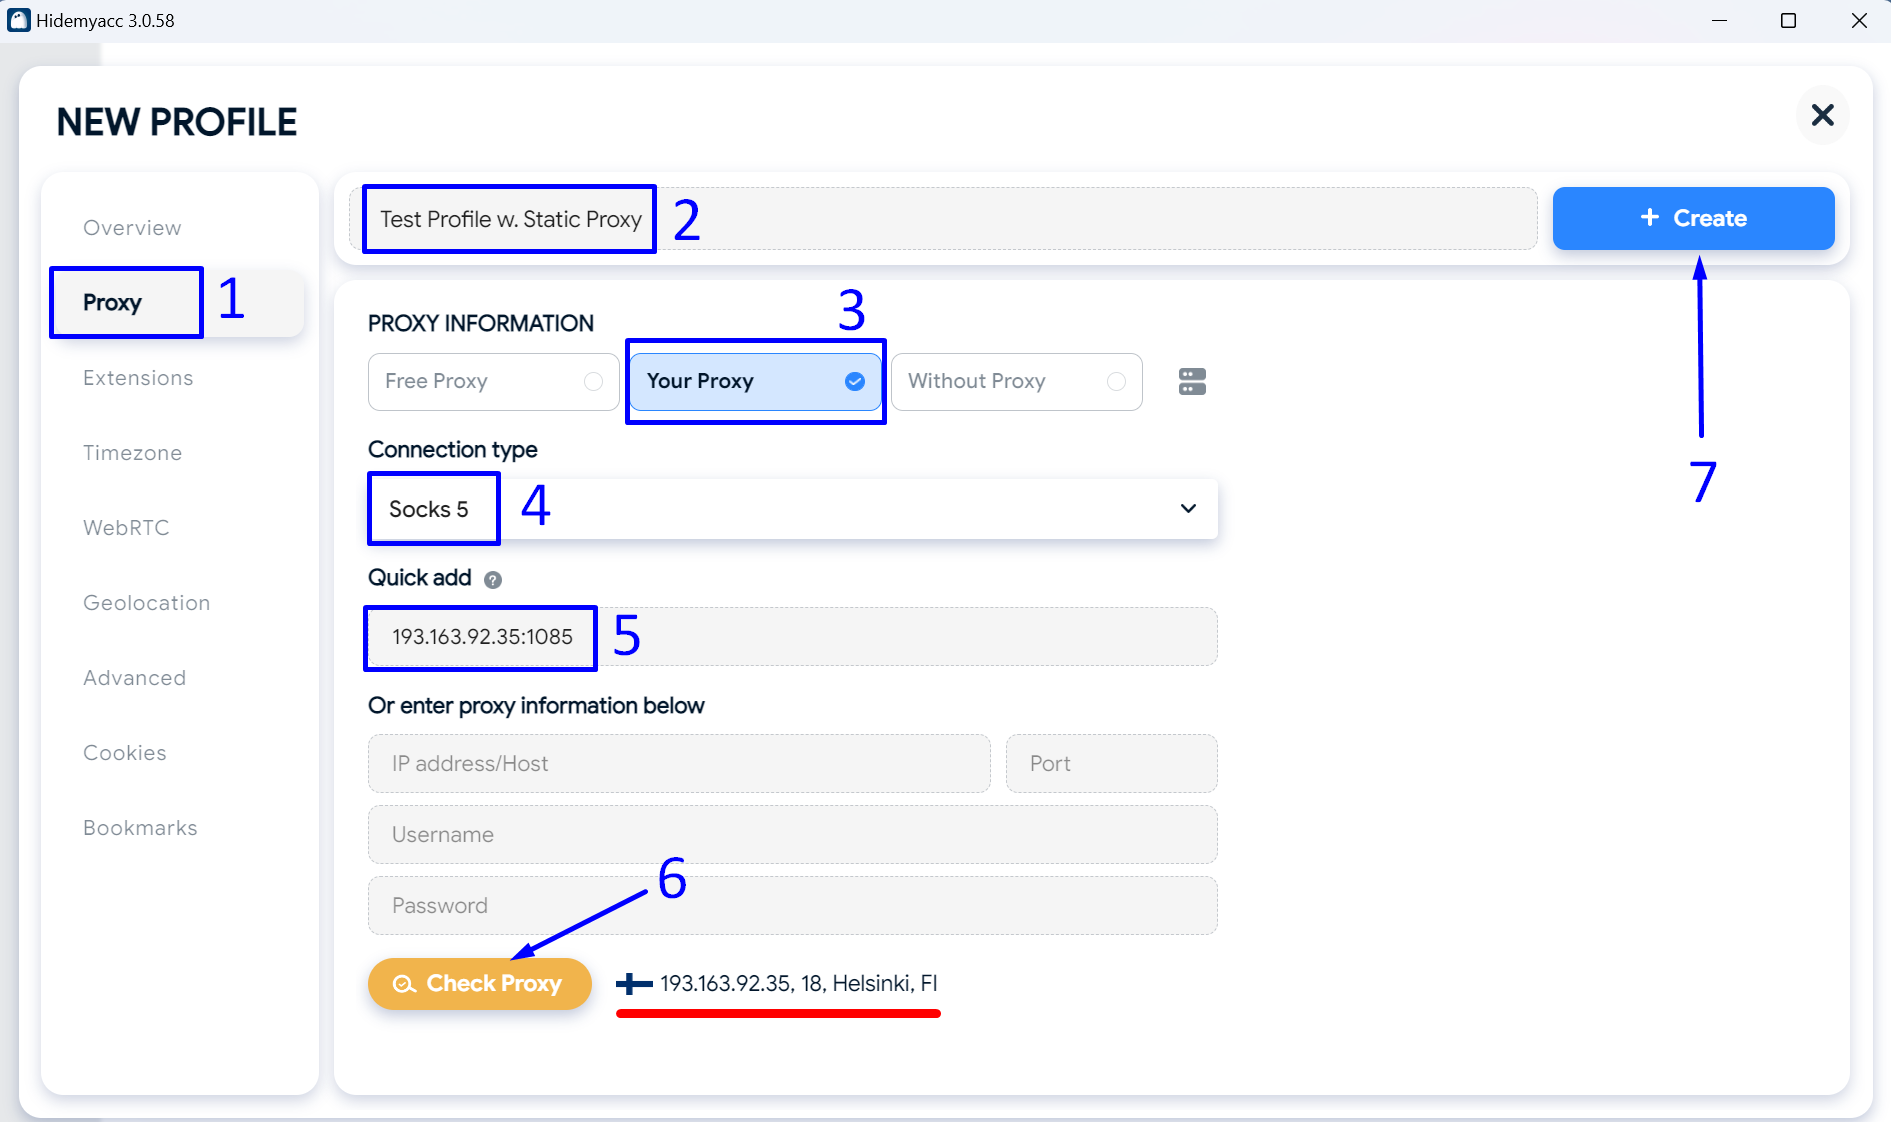
- In the left menu, click on the “Proxy” section.
- Name the profile with a memorable title.
- In the Proxy Information section, select “Your Proxy”.
- Choose the protocol supported by your proxy. If available, we recommend choosing the “Socks5” protocol as it is the most versatile and anonymous.
- Enter the IP address of your proxy and its port.
In our case, the proxy does not require authentication with a username and password, so we leave the Username and Password fields blank.
- Click on “Check Proxy” to test the connection with the proxy server.
If the connection is successfully established, a flag of the proxy’s country and its geo-data will appear (highlighted in red on the screenshot). - Save the settings by clicking the “+ Create” button.
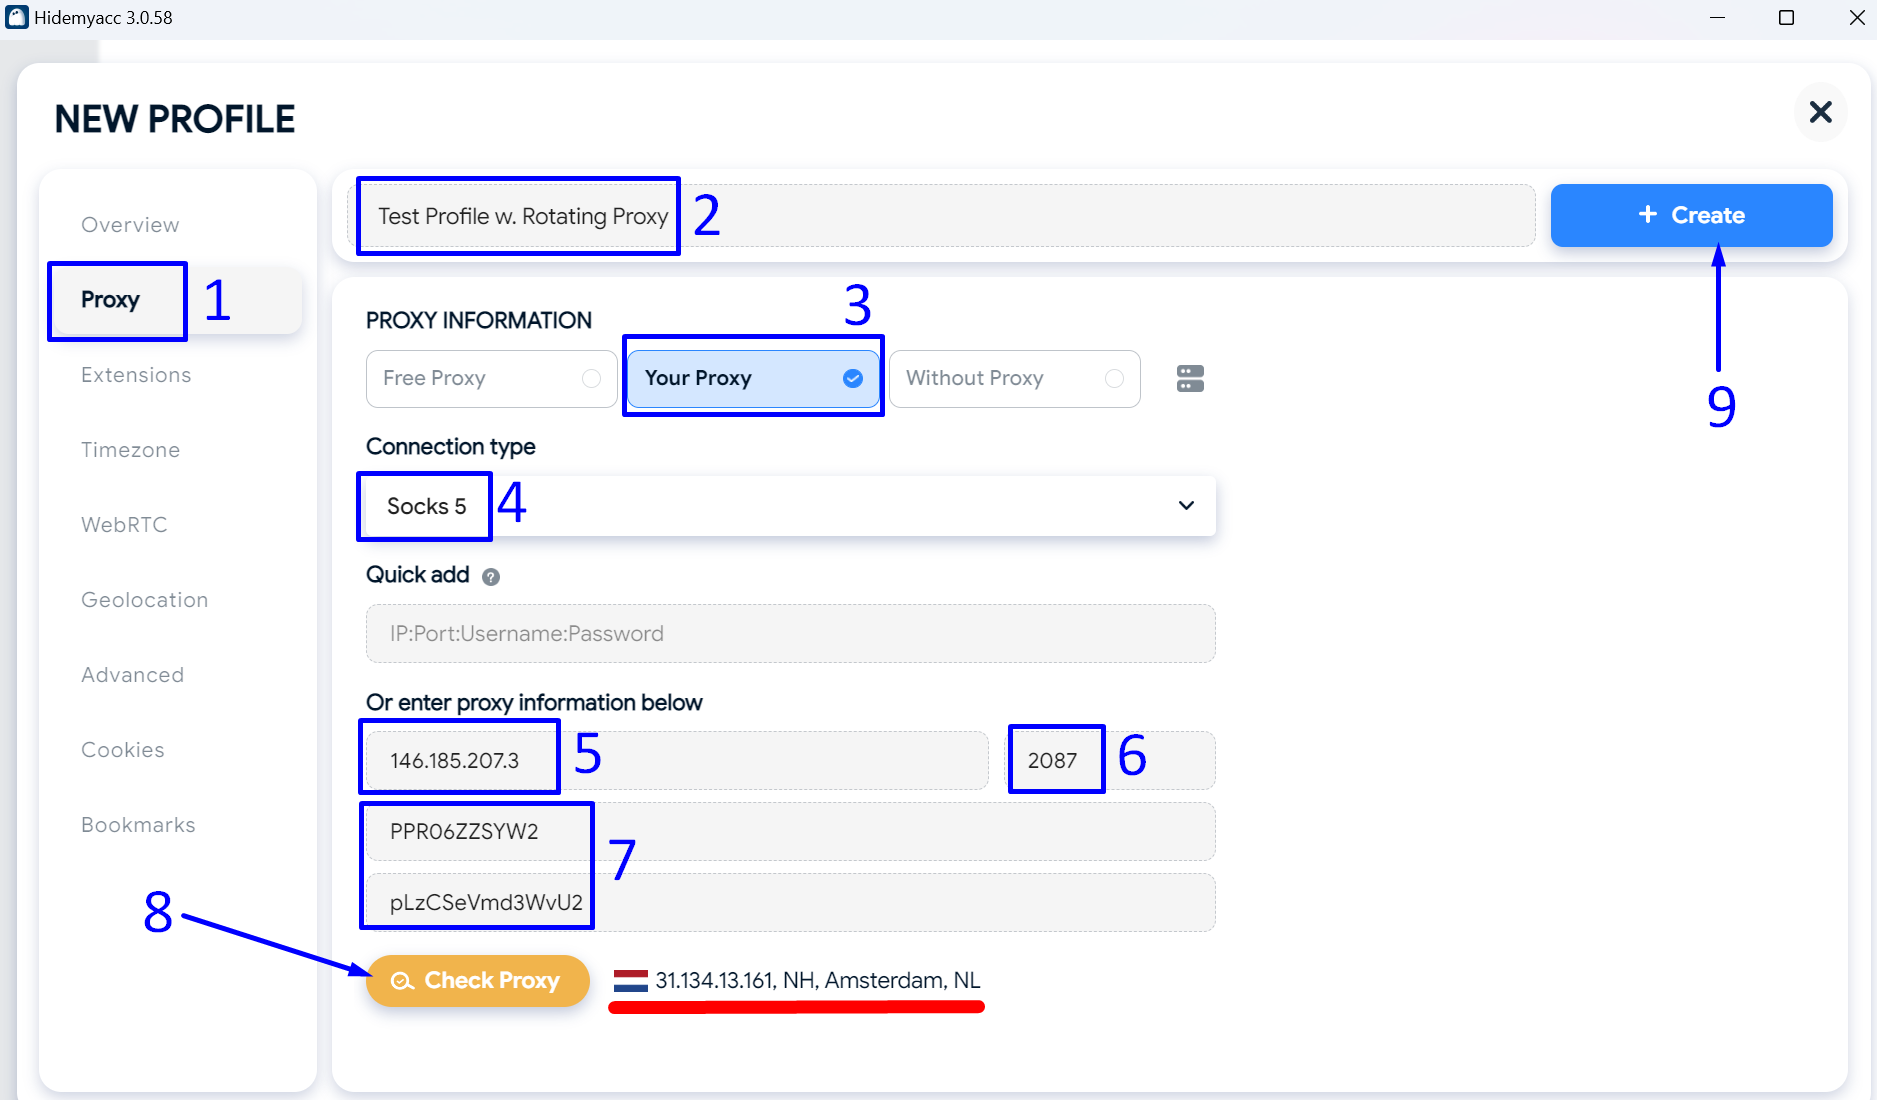
Szenario 2: Creating a Profile with a Rotating Proxy
An unconventional yet important use case for the Hidemyacc browser is conducting competitive research across different regions.
For such tasks, utilizing a rotating proxy is crucial. Rotating proxies change the IP address periodically, allowing for anonymous access to geo-restricted content from various locations without raising suspicion.
This setup is particularly valuable for businesses that need to gather data on regional market trends or monitor competitor activities across different geographic areas.
To add a rotating proxy to the Hidemyacc browser, follow these steps:
- In the left sidebar, click on the “Proxy” section.
- Name the profile with a memorable name.
- In the Proxy Information section, select “Your Proxy”.
- Choose the protocol of your proxy. In our case, we chose “Socks5”.
- Enter the IP address of the proxy gateway. Note that this is not the IP address your profile will receive, but rather the gateway through which your profile will receive a new IP each time.
- Enter the port of your gateway.
- Provide the login and password for the authentication of your proxy gateway.
- Click on the “Check Proxy” button to test the connection with the gateway.
Hidemyacc will attempt to connect to the specified gateway and retrieve a random IP. If a message appears with a flag and geolocation of the proxy (highlighted in red), everything is in order. - Save the settings by clicking the “+ Create” button.
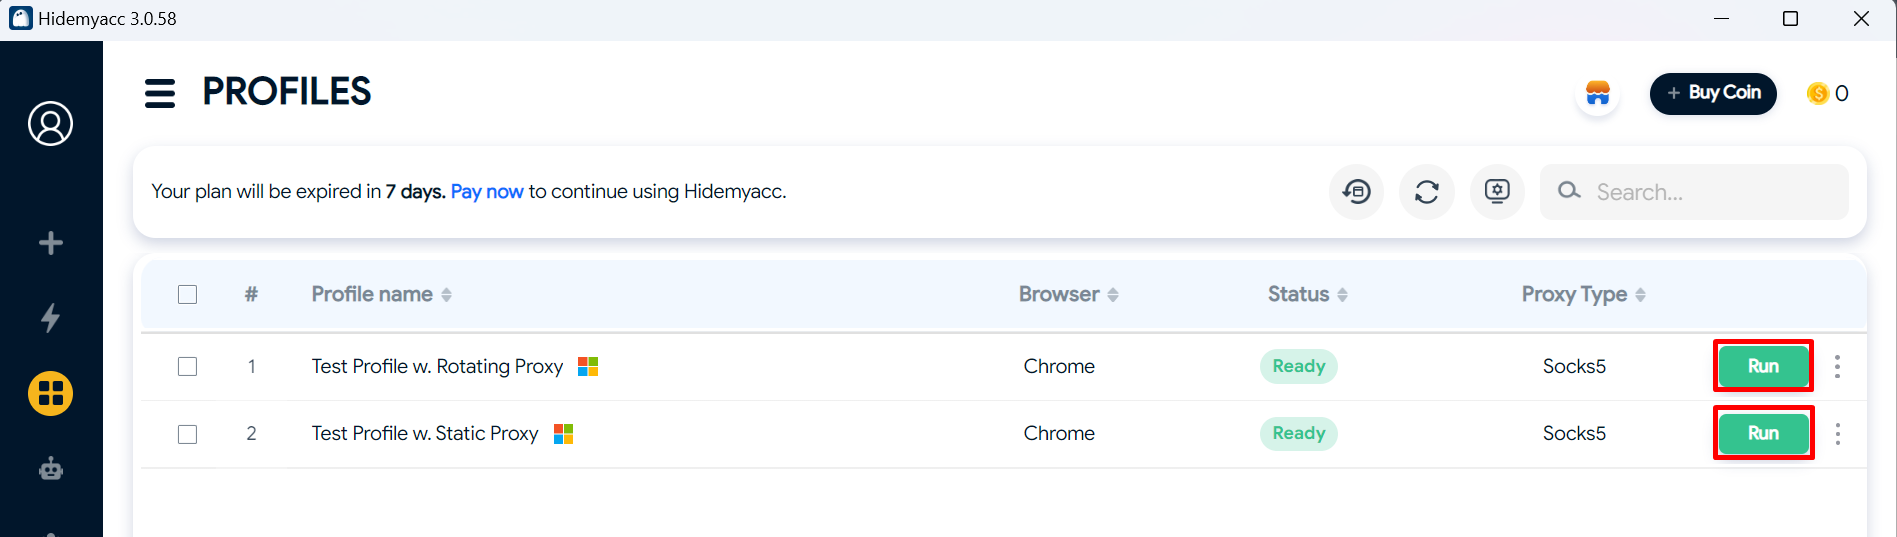
Results
As you can see in the screenshot below, our two profiles (static and rotating) are ready for use.
To launch the Hidemyacc browser with the required profile settings, simply click on the “Run” button next to the corresponding profile.