


What is the Incogniton Browser?
The Incogniton Browser is a specialized anti-detect browser designed for managing multiple online profiles simultaneously. It allows users to operate numerous distinct identities with individualized browser environments, making it ideal for activities like social media management, affiliate marketing, and digital advertising. This browser supports the use of various proxy types to further assist with anonymity and reduce the risk of account bans or restrictions.
Why You Should Use Proxies with Incogniton Browser?
Using proxies with the Incogniton Browser significantly enhances user privacy by masking real IP addresses, which is crucial for managing multiple profiles without detection. This setup allows users to simulate access from various global locations, aiding in tasks like geo-targeted content testing and ad verification. Additionally, proxies help reduce the risk of account bans or restrictions on platforms where multiple logins might be penalized, making it an essential tool for digital marketers and social media managers who operate numerous accounts.
Setting Up a Proxy in Incogniton Browser
Incogniton Browser users have a variety of choices when it comes to enhancing their online experience with proxies. They can choose either rotating or static proxies, depending on their needs for stability or changing IP addresses.
There is also a choice of proxy protocols. HTTP/S proxies offer faster data transfer, making them suitable for speed-intensive browsing.
On the other hand, SOCKS proxies offer a higher level of anonymity, which may be preferred by users seeking greater privacy. Ultimately, it is up to the user to decide which type or protocol to use.
In this guide, we will demonstrate how to add SOCKS proxies to the Incogniton browser, using both static and rotating proxies as examples.
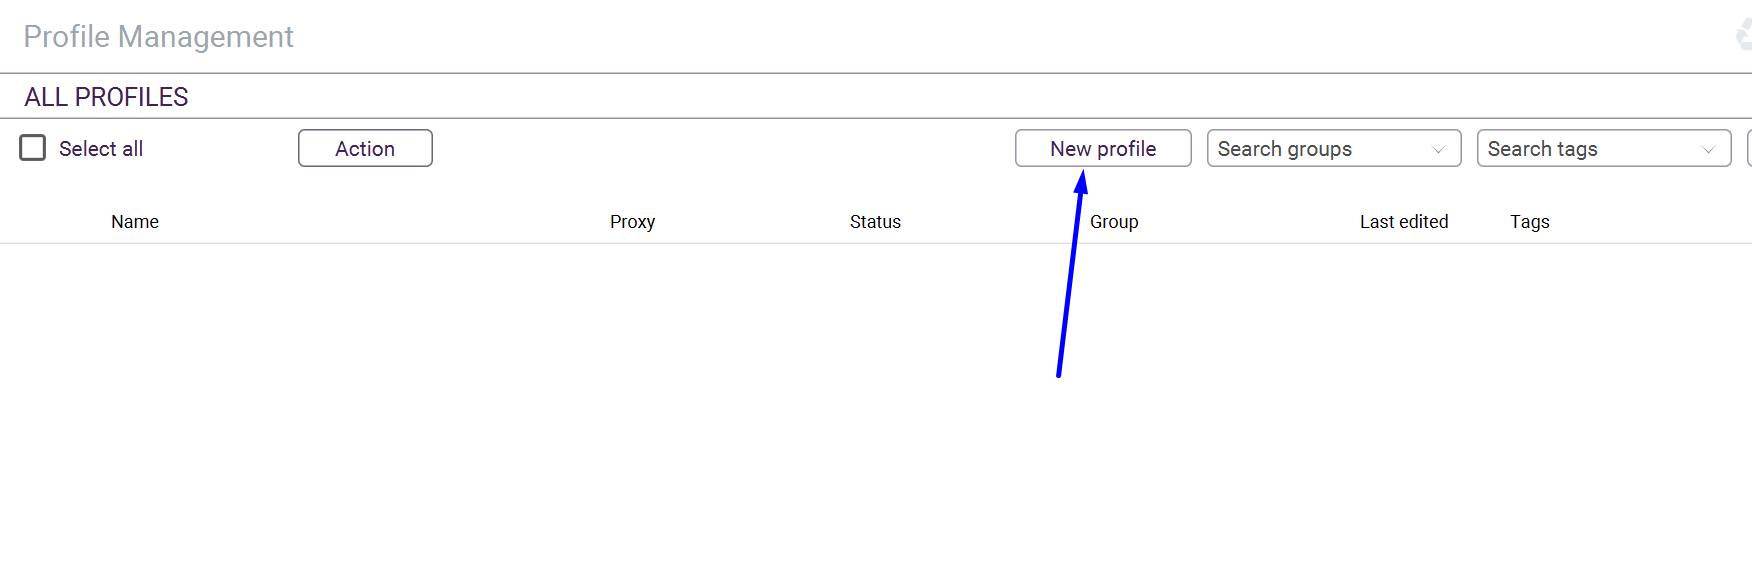
Step 1: Create a New Profile
Open the Incogniton anti-detect browser and create a new profile by clicking the corresponding button.
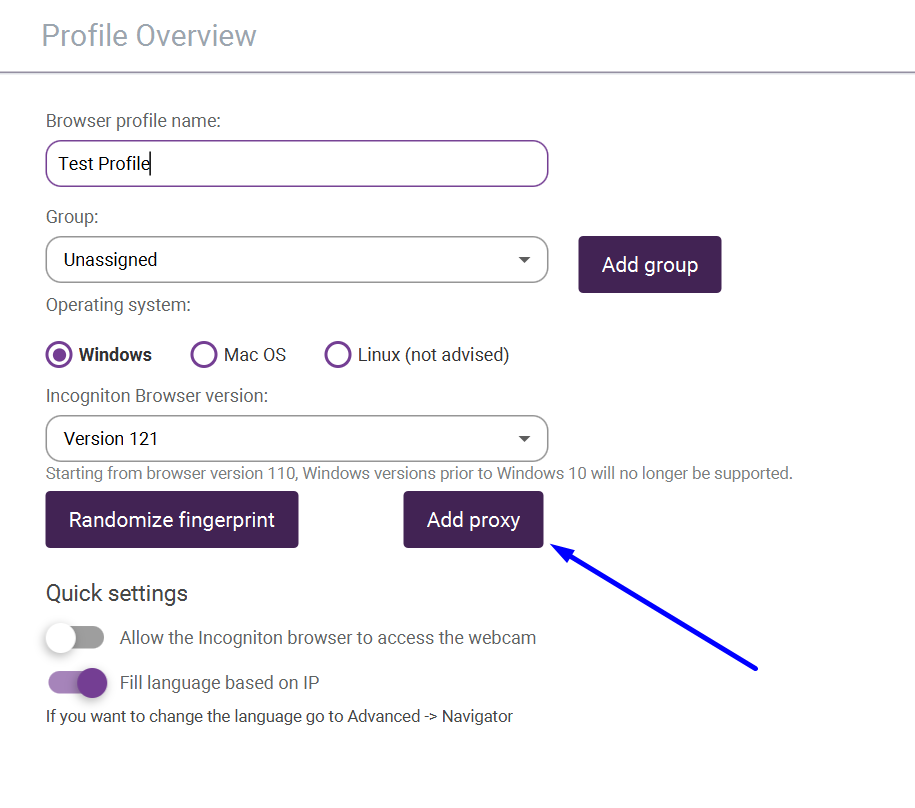
Step 2: Add a New Proxy
Set a name for the profile, select the desired operating system and then press the “Add proxy” button.
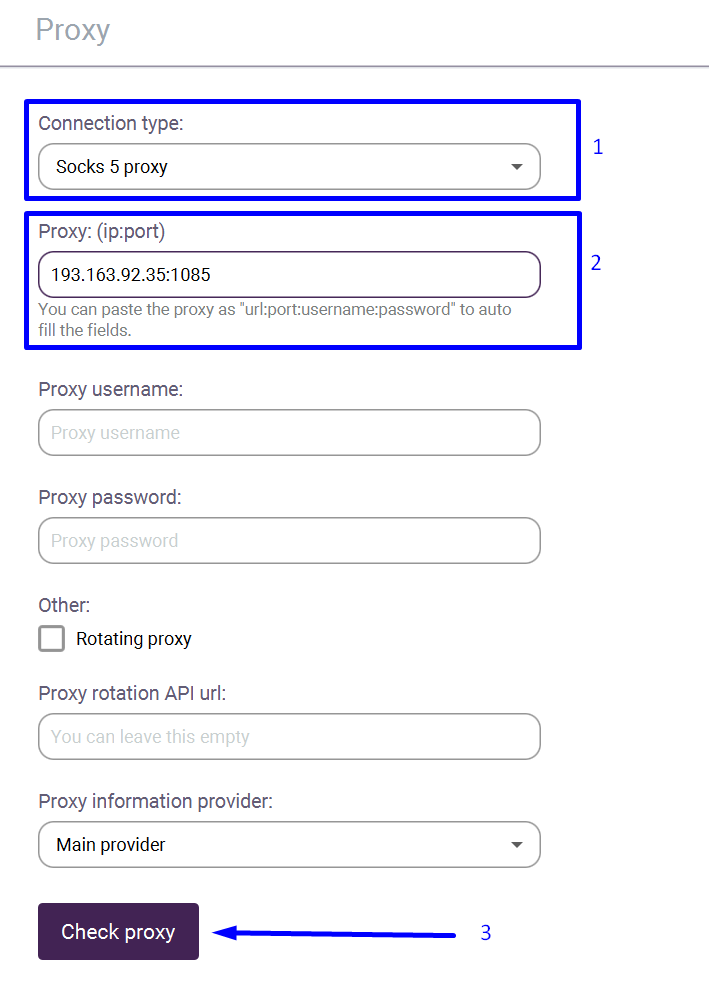
Step 3: Add a Static SOCKS5 Proxy
Select the appropriate protocol, enter the IP address of the proxy and its port. Then click the “Check proxy” button.
Step 4: Add a Rotating SOCKS5 Proxy
For a rotating proxy, you will need to enter the IP and Port, as well as your username and password. Check the box next to “Rotating proxy“.

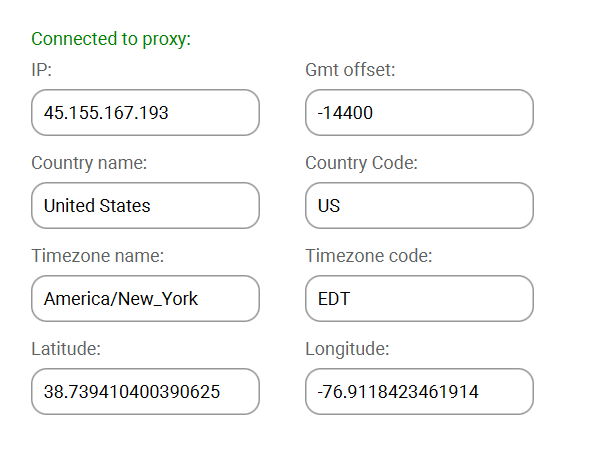
Step 5: Check if the Proxy Works Properly
The proxy has been tested for functionality.
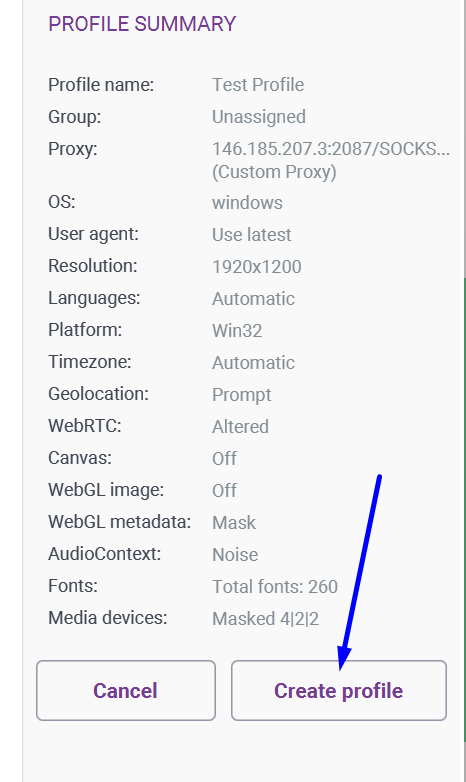
Step 6: Finalize Creating Your New Profile
Click the “Create profile” button to complete the setup of the new profile.
Step 7: Start Working with the Profile
Everything is ready. You can start working now.
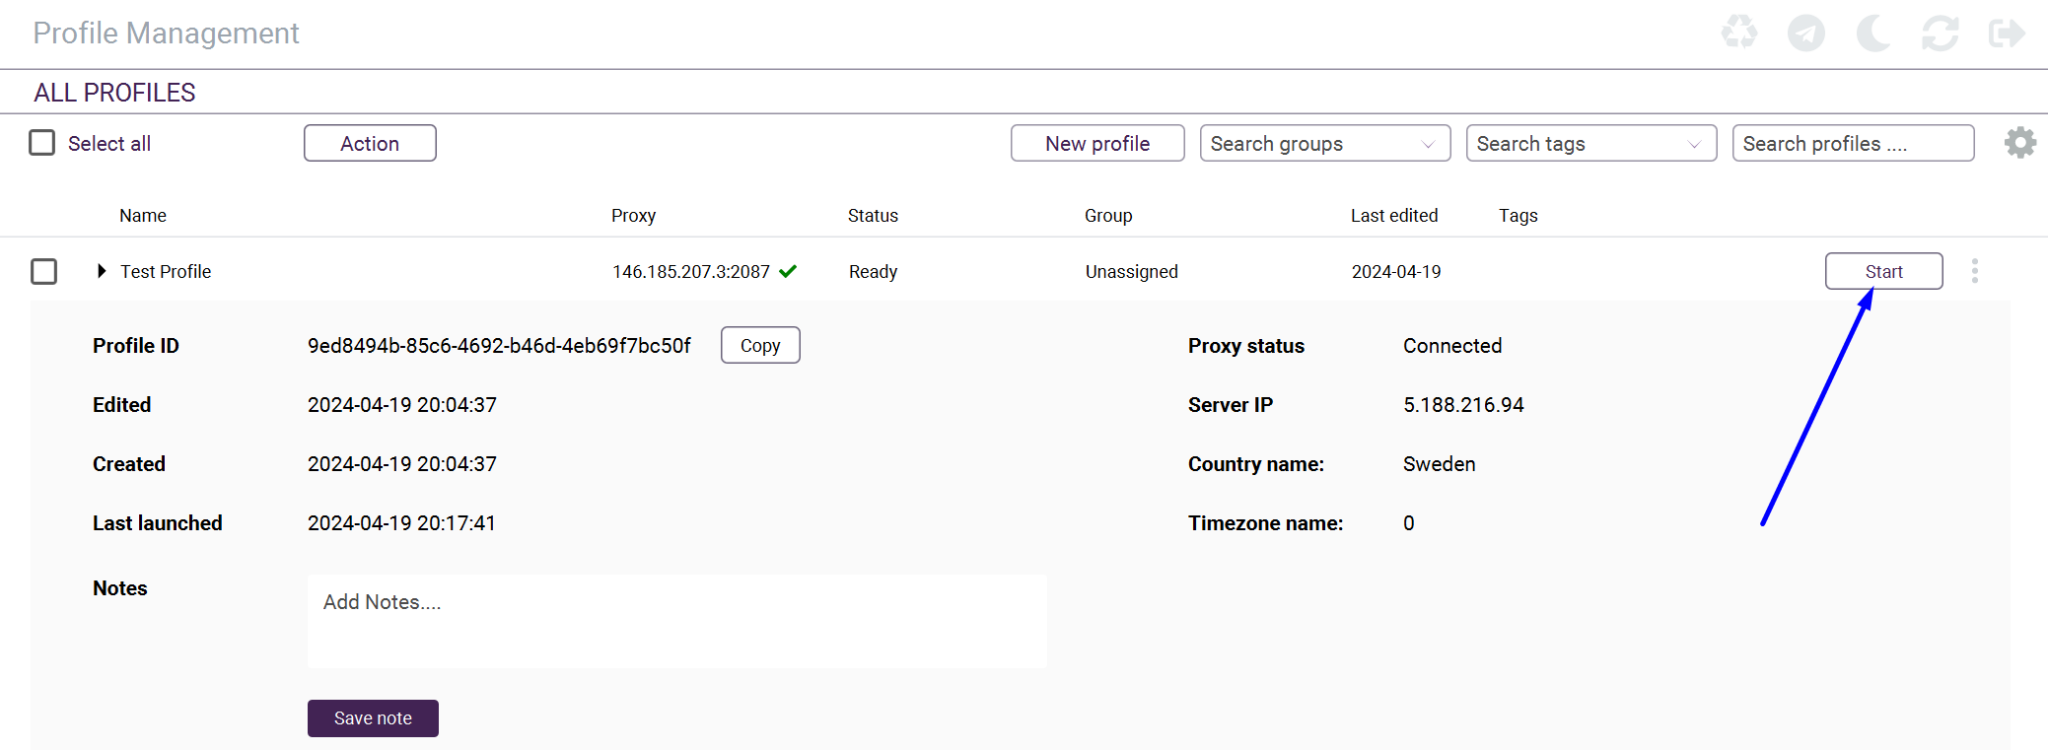
When you click the Start button, a new Incogniton browser window will open. Your IP will be masked by the proxy server’s IP.
If you have chosen to use a rotating proxy, your IP address will change with every new browser window refresh or when you navigate to a new page.
