


What is MarketerBrowser?
MarketerBrowser is a professional anti-detect browser designed to manage multiple accounts on different websites simultaneously. It provides users with tools to control and customize their digital fingerprints, ensuring anonymity and security online. This browser is especially useful for digital marketers and social media managers who need to operate multiple different profiles without triggering security protocols that could lead to account restrictions or bans.
Why Are Proxies Essential for MarketerBrowser?
Proxies are critical to MarketerBrowser because they allow users to manage multiple online profiles on different platforms without being detected. By using proxies, each profile can appear to come from a unique IP address, increasing anonymity and reducing the risk of account bans or restrictions. This is especially important for digital marketers who need to simulate access from different geographic locations to test campaigns or effectively manage different marketing strategies. Proxies also help maintain the operational efficiency and security of each profile.
Setting Up a Proxy in the Marketer Browser
In this guide, we will demonstrate how to set up proxies in Marketer Browser, which supports both HTTP and SOCKS4/5 protocols. You have the option to use static proxies, which have a consistent IP, or rotating proxies, which change IP addresses dynamically with each action.
For both scenarios, we will use the SOCKS5 protocol as it provides the highest level of anonymity and versatility for the tasks you can perform with Marketer Browser.
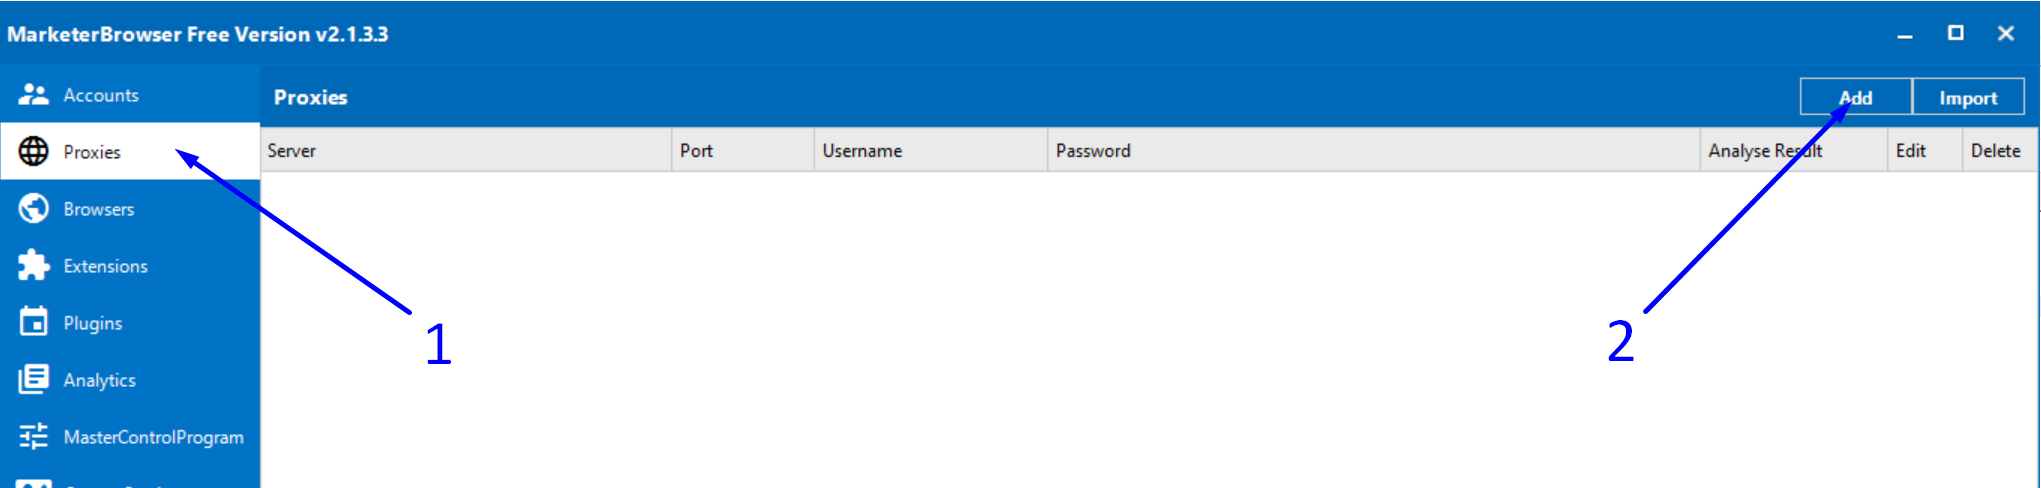
Step 1: Adding a New Proxy
- Navigate to the “Proxies” section.
- Click on the “Add” button located in the upper right corner of the program.
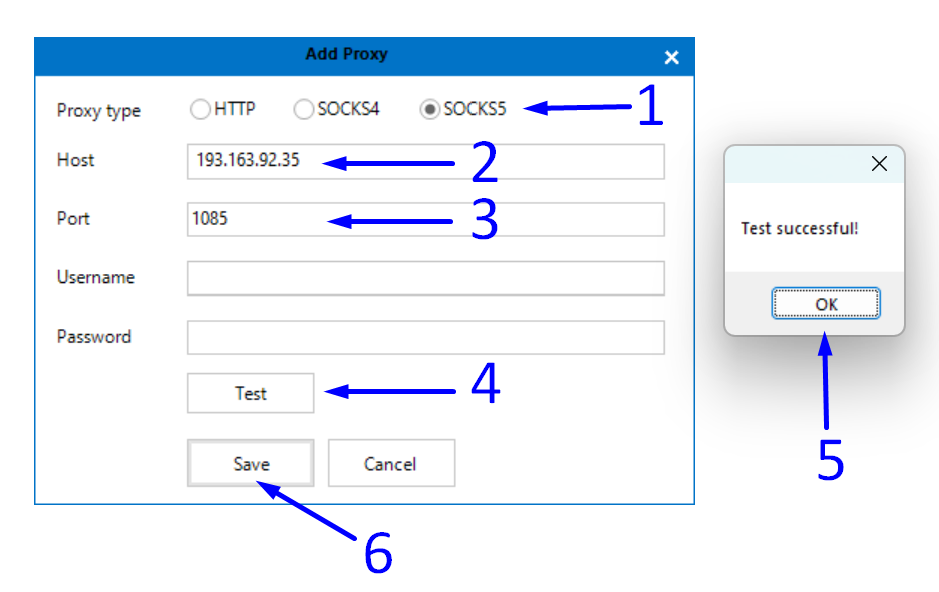
Step 2: Setting Up a Static Proxy
- Switch to SOCKS5 mode.
- Enter the IP address of your static proxy into the “Host” field.
- Enter the appropriate port in the “Port” field.
Note: Our SOCKS proxy does not require a username and password for connections through port 1085, so leave these fields empty. Note that your setup might differ. - Click the “Test” button to verify the connection with the proxy.
- If the test is successful and you see a “Test successful” message, everything is set up correctly. Simply close the window by clicking “OK“.
- Save your proxy settings by clicking the “Save” button.
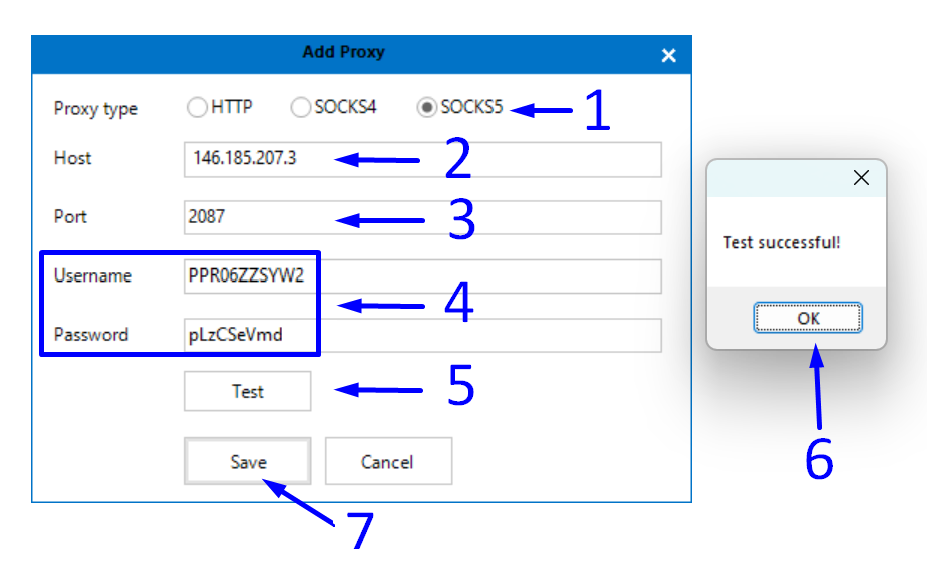
Step 3: Setting Up a Rotating Proxy
- Set the SOCKS5 protocol.
- Enter the IP address of the rotating proxy gateway in the “Host” field.
- Enter the required port in the “Port” field.
- Authorization by password is necessary for rotating proxies. Enter your username in the “Username” field and your password in the “Password” field.
- Click the “Test” button to check the connection to the proxy.
- If the test is successful and a “Test successful” window appears, everything is in order. Simply close the window by clicking “OK“.
- Save the proxy settings by clicking the “Save” button.
Now you know how to configure a proxy server for the Marketer Browser antidetect browser. To ensure your accounts are securely protected, use private proxy servers for each account. This way, you’ll avoid blocks and continue to promote your business online.
