

What is Octo Browser?
Octo Browser is an advanced anti-detect browser designed for multi-accounting with maximum protection against browser identification. It allows users to maintain an unlimited number of virtual profiles, making it impossible for websites to track real browser fingerprints.
The browser is tailored for users who need to efficiently manage multiple accounts, such as in affiliate marketing, e-commerce, and other digital activities that require maintaining numerous separate identities online. Octo Browser supports detailed customization of browser settings and integrates with automation tools to streamline repetitive tasks, making it a powerful tool for digital marketers and privacy-conscious users alike.

Why Are Proxies Needed in Octo Browser?
Proxies are essential in Octo Browser for several reasons:
Improved anonymity and security: Proxies mask your real IP address, making it difficult for websites to track your activity. This is critical when managing multiple accounts to avoid detection and potential bans from platforms that monitor for suspicious activity.
Geo-targeting and content access: By using proxies, you can access content or platforms that are geo-restricted, allowing you to operate in different markets without being physically present in those locations. This is particularly useful for tasks such as ad verification and social media management across multiple geographies.
Performance optimization: Proxies can improve load times and reduce bandwidth usage by caching data. This is beneficial when accessing the same resources repeatedly across different profiles managed by Octo Browser.
Risk mitigation: Using different proxies for different profiles reduces the risk of banning all accounts if one is detected. This is especially important for users engaged in sensitive activities such as market research, affiliate marketing, or data scraping.
Collaboration and scalability: Proxies allow teams to manage profiles without overlapping or interfering with each other’s activities, which is essential for collaborative projects and large-scale operations using Octo Browser.
These features underscore the importance of proxies in maintaining operational efficiency and security when using Octo Browser to manage multiple online profiles and tasks.
Setting Up Proxies in Octo Browser
This guide will walk you through the steps to set up proxies in Octo Browser, ensuring that each account operates under its own IP address to avoid potential blocks and safeguard your digital operations.
Octo Browser supports proxy protocols including HTTP/S, SOCKS4/5, and SSH. It also offers the option to use static proxies, rotating proxies, and the ability to upload an entire list of proxies.
We will demonstrate two different ways of using proxies in Octo Browser:
1. Creating a profile with a static proxy, where the IP address will be constant. This IP address will be assigned to the profile and used for every internet activity conducted through this profile.
2. Creating a profile with a rotating proxy, where the IP address is dynamic, changing with each new action the profile takes (opening a new page, refreshing a page, clicking on a link, etc.). For this, a rotating type of proxy is necessary.
In both scenarios, we will use SOCKS5 proxies, as they provide a higher level of anonymity compared to HTTP proxies.
Step 1: Adding New Proxies in Octo Browser
First, we want to add two different types of proxies to the Octo Browser proxy manager. Later, these proxies will be assigned to different browser profiles to handle various types of tasks.
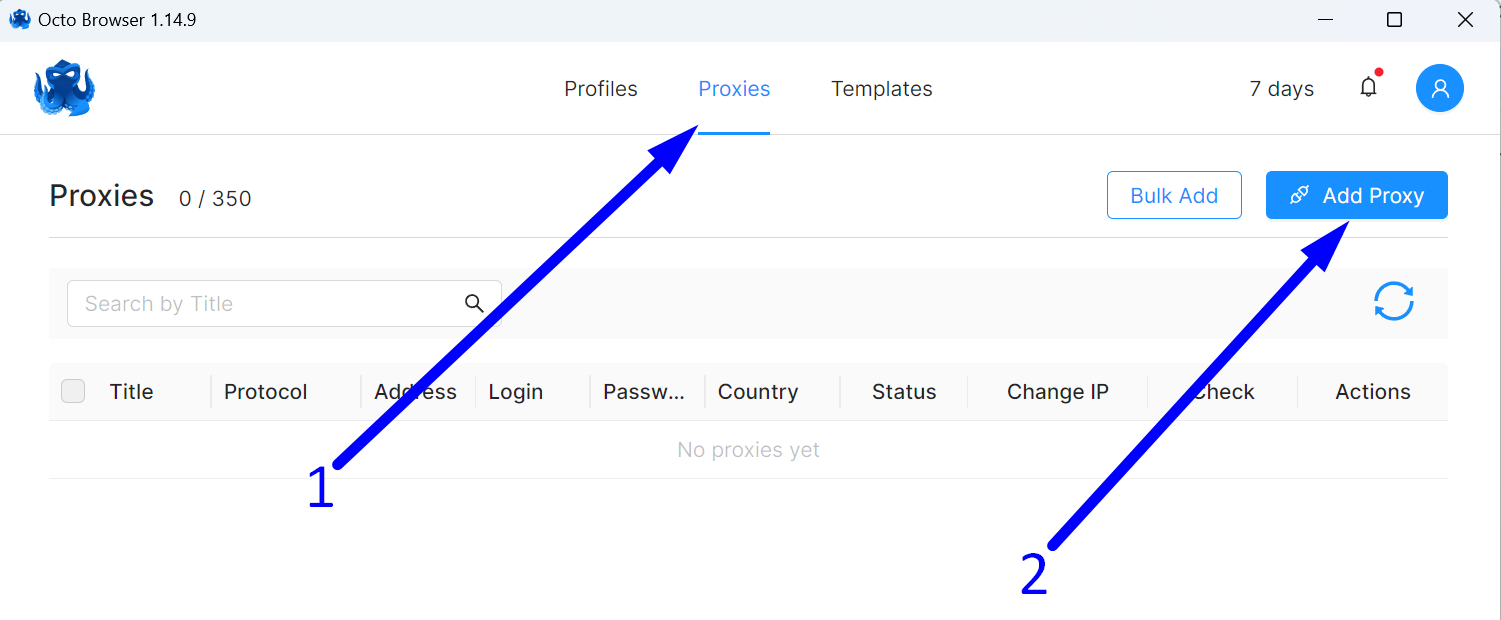
To add a new proxy in Octo Browser:
- Click on the “Proxies” label at the top of the program’s screen.
- Press the “Add Proxy” button located in the upper right corner.
Step 2: Entering Static Proxy Data
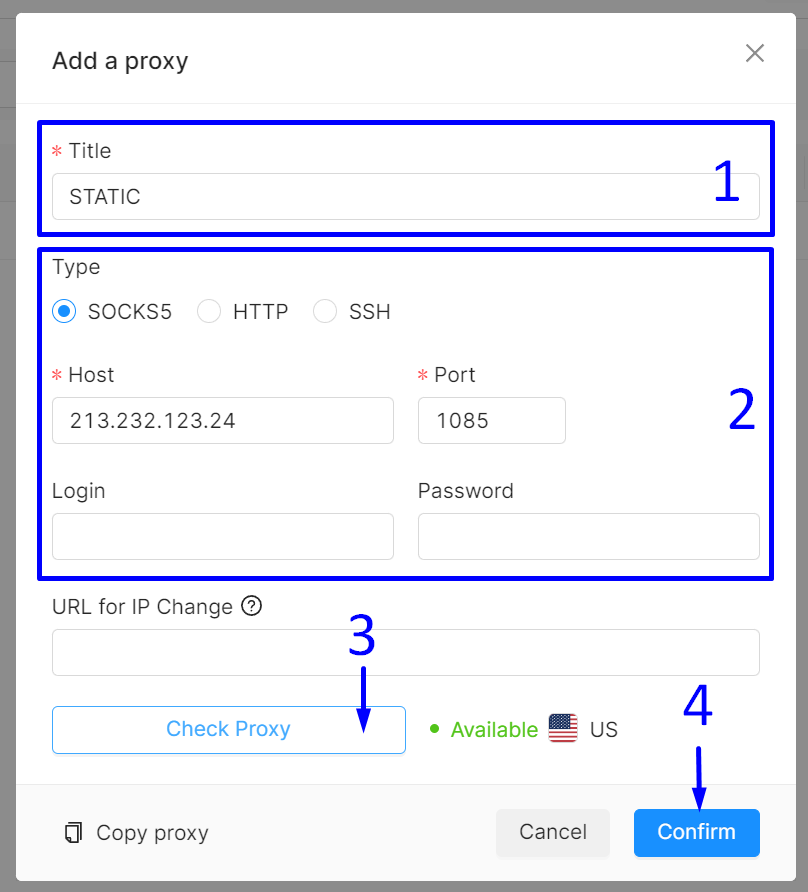
- Let’s come up with a memorable name for the proxy, such as “STATIC,” and enter it in the “Title” field.
- In the “Type” section:
- Choose the proxy protocol – SOCKS5 (reliable and anonymous).
- Enter the IP address of our static proxy in the “Host” field.
- Enter the port number 1085 in the “Port” field.
For Proxy Compass clients, we always recommend using port 1085 for creating SOCKS connections. When using this port, there is no need to fill in the “Login” and “Password” fields.
- Click on the “Check Proxy” button to test the proxy connection. If a green “Available” label and the country’s flag appear, everything is set up correctly.
- Click on the “Confirm” button to save the proxy.
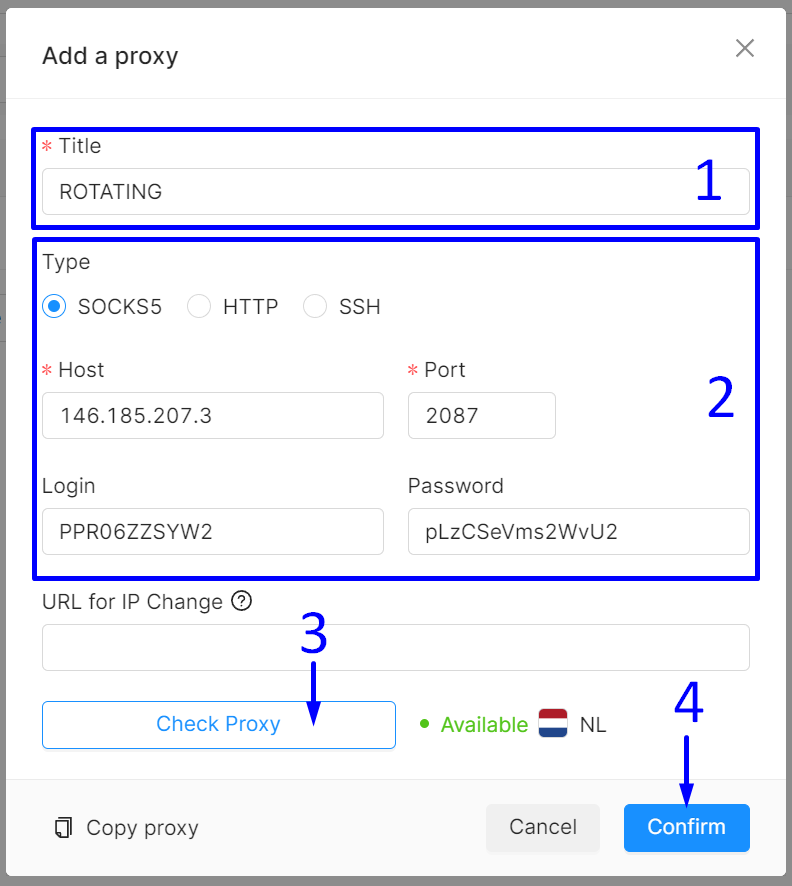
Step 3: Entering Rotating Proxy Data
In this step, we assign the title “ROTATING” to the rotating proxy profile.
In the “Type” section:
- Select the proxy protocol – SOCKS5, known for its robust security and anonymity.
- In the “Host” field, input the IP address of our rotating proxy gateway.
Note:146.185.207.3 is not the actual proxy IP but the IP of the general rotating gateway through which you, as a Proxy Compass client, will receive random IP addresses. - In the “Port” field, enter the port number 2087.
- Input your Login credentials in the “Login” field.
- Enter your Password in the “Password” field.
Click on the “Check Proxy” button to test the proxy connection. If you see a green “Available” sign and the country flag, the connection is successfully established.
Click the “Confirm” button to save the proxy settings. All done!
Step 4: Quick Profile Creation
To quickly create the desired number of profiles, follow these steps:
- Navigate to the “Profiles” section.
- Click the “Quick Profile” button as many times as needed to create multiple profiles instantly.
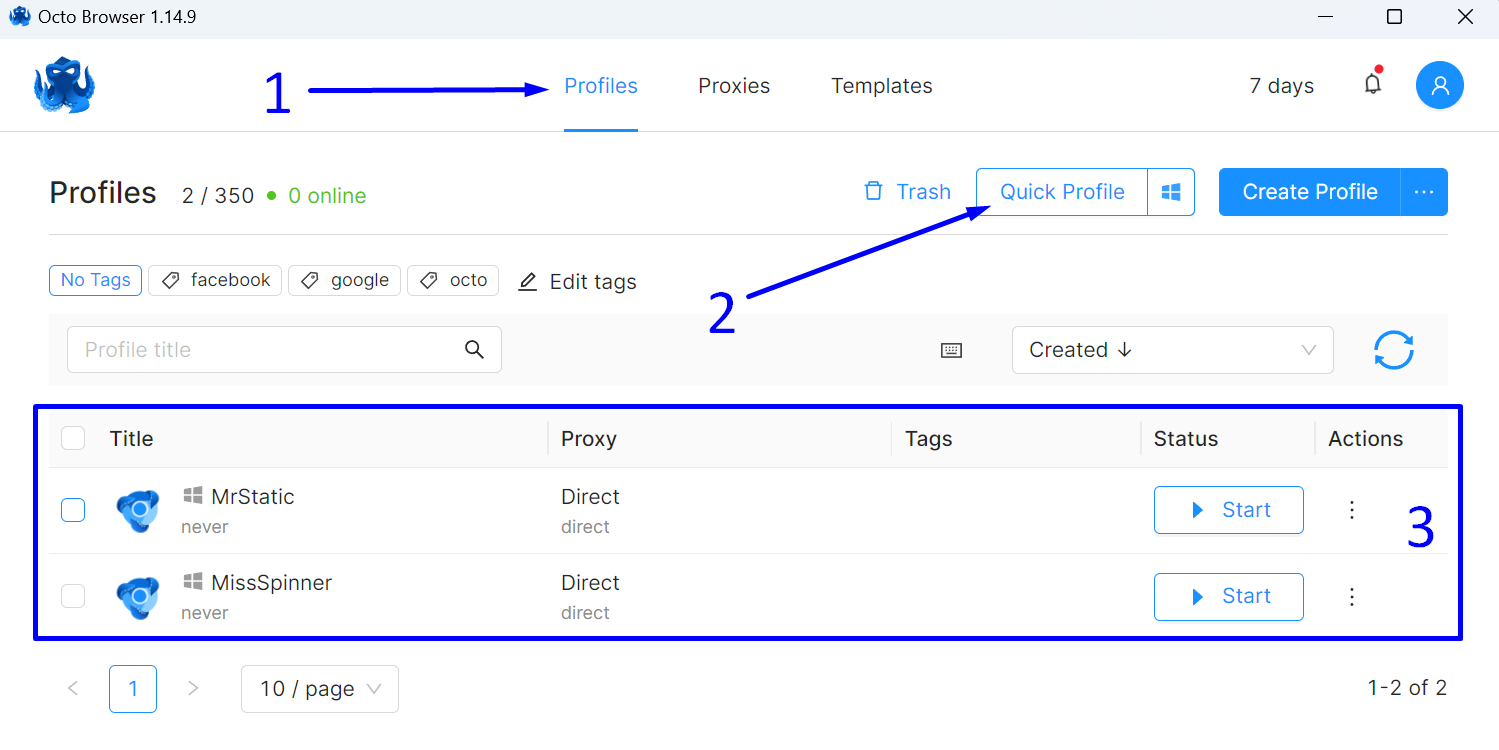
We will click the “Quick Profile” button twice to create two distinct profiles. We’ll give them memorable names for easy identification.
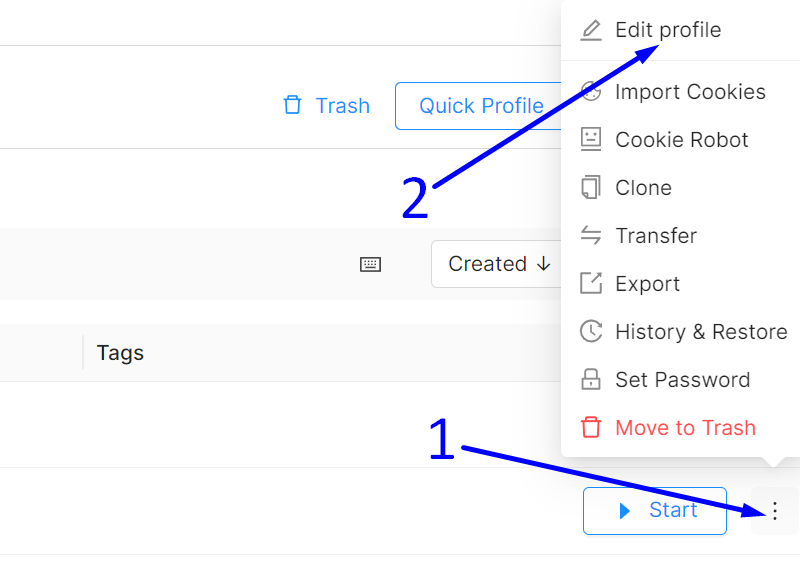
To change a profile’s name, you should:
- Click on the three dots icon next to the desired profile.
- In the popup menu that appears, select “Edit profile”.
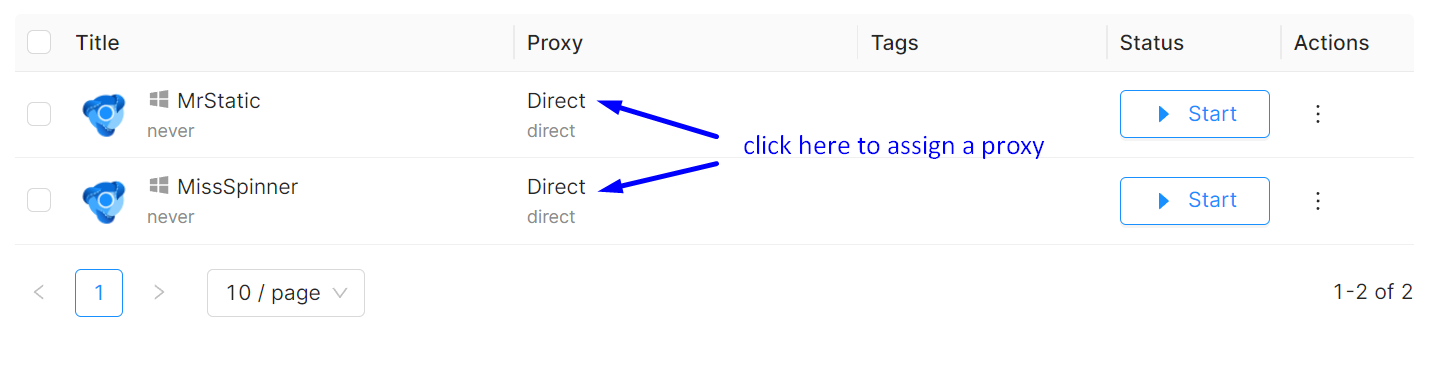
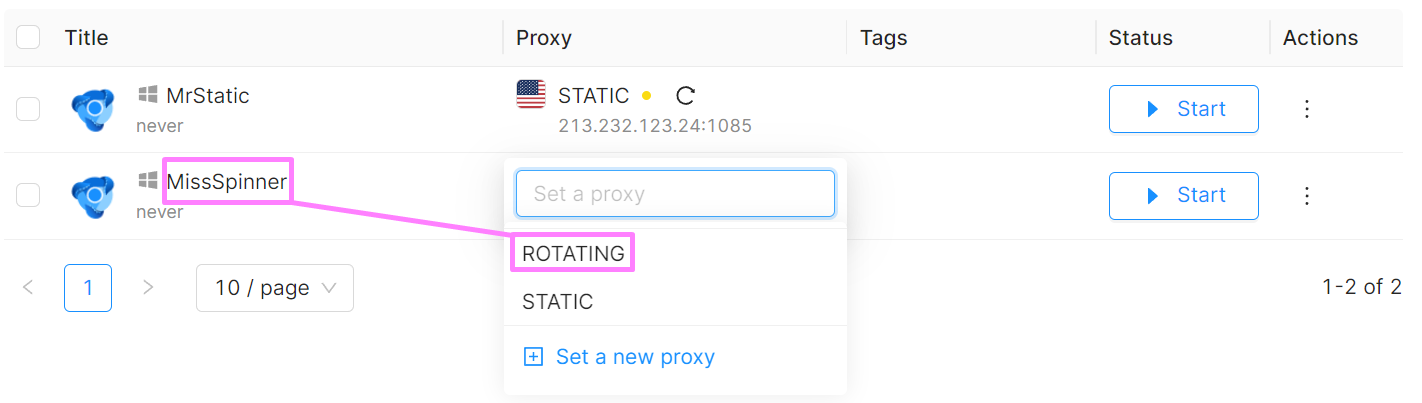
Step 5: Assigning a Proxy to Each Profile
We previously created two test profiles named MrStatic and MissSpinner.
Now, we need to connect the static proxy to the MrStatic profile, which will always maintain the same IP address.
For the MissSpinner profile, we’ll connect a rotating proxy, allowing this profile to continuously change IP addresses.
To modify the connection settings and assign a specific proxy to a profile, click on the “Direct” label next to the corresponding profile.
For the MrStatic profile, we will set up a static proxy.

For the MissSpinner profile, we will set up a rotating proxy.
And here’s what we’ve achieved.
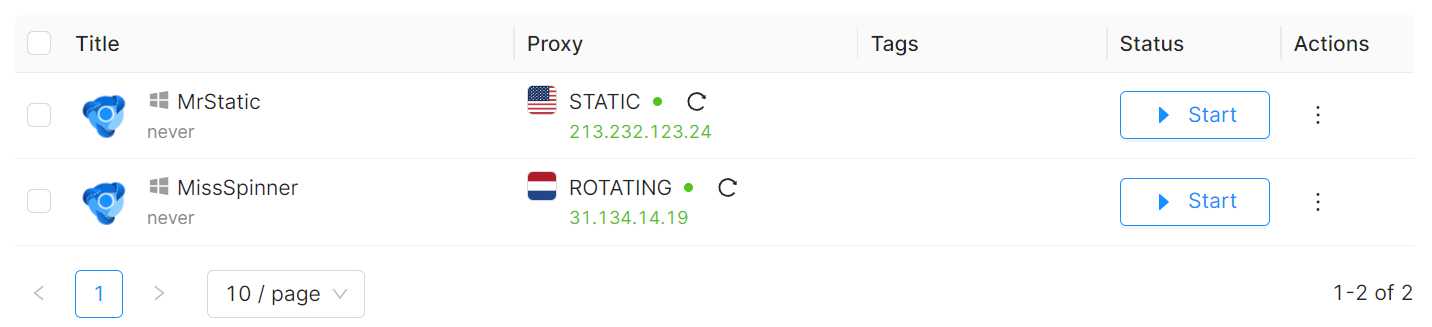
The profiles have received their respective proxies and are ready for use, each tailored for specific tasks.
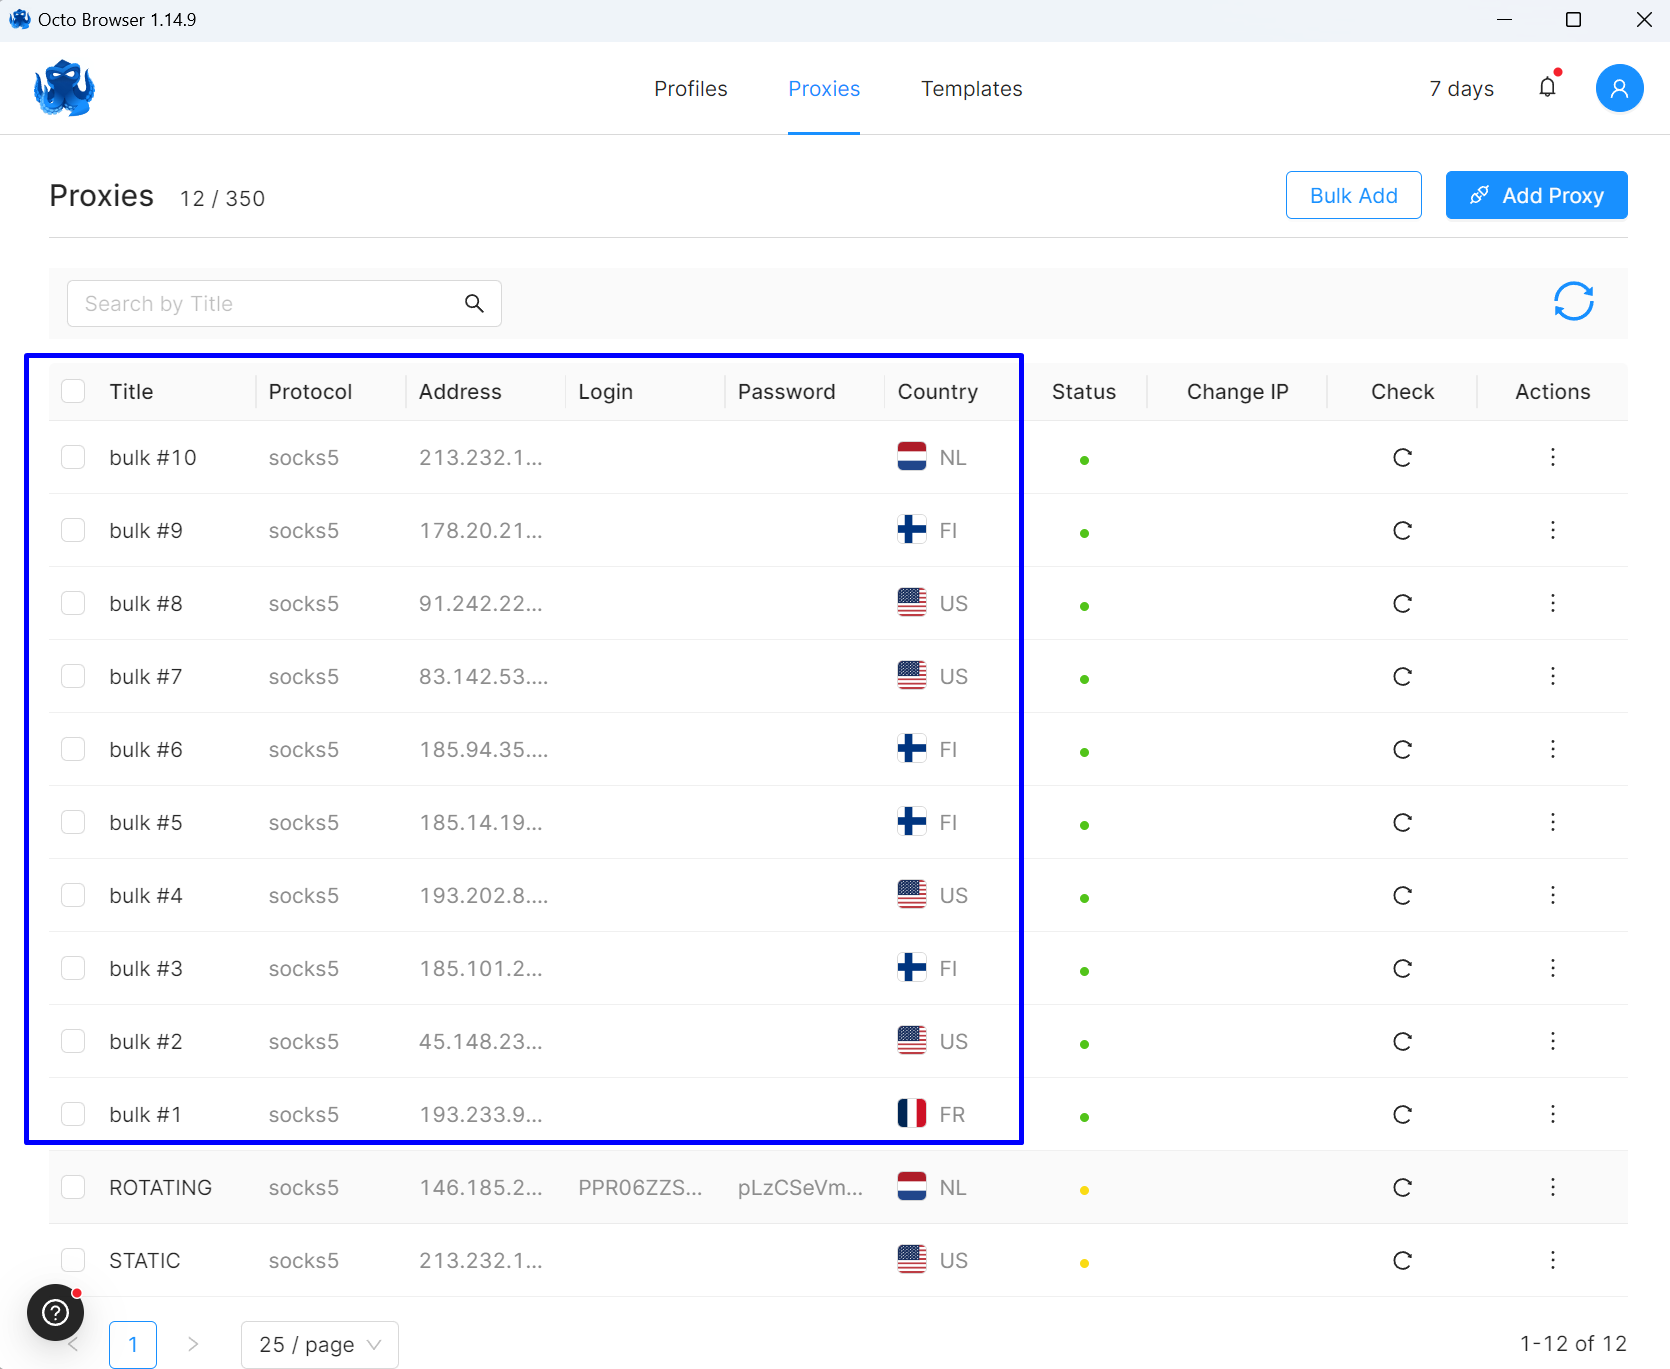
Step 5: Bulk Proxy Upload in Octo Browser
Octo Browser’s Advanced version supports up to 1200 profiles, each capable of having its unique proxy.
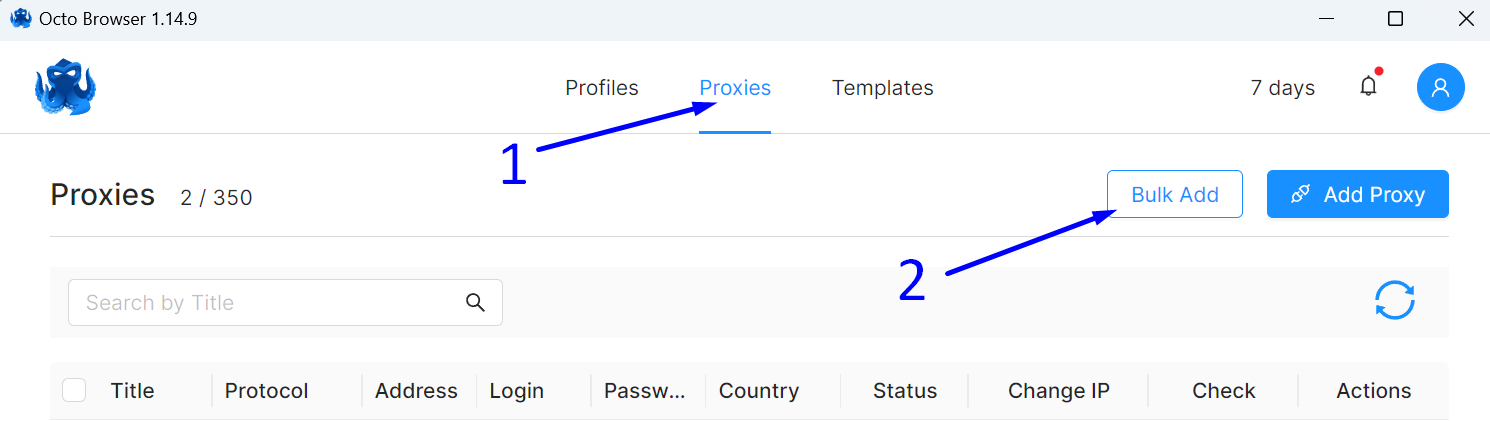
To massively add a large number of proxies to the Octo Browser proxy manager, you need to:
- Navigate to the proxy manager by clicking on the “Proxies” button.
- Click on the “Bulk Add” button.
Before uploading, you need to prepare your list of proxies in the following format:
To add SOCKS proxies:
socks://[proxy ip]:[port]
socks://[proxy ip]:[port]
socks://[proxy ip]:[port]
socks://[proxy ip]:[port]
socks://[proxy ip]:[port]
…
To add HTTP or HTTPS proxies:
http://[proxy ip]:[port]
http://[proxy ip]:[port]
http://[proxy ip]:[port]
http://[proxy ip]:[port]
http://[proxy ip]:[port]
…
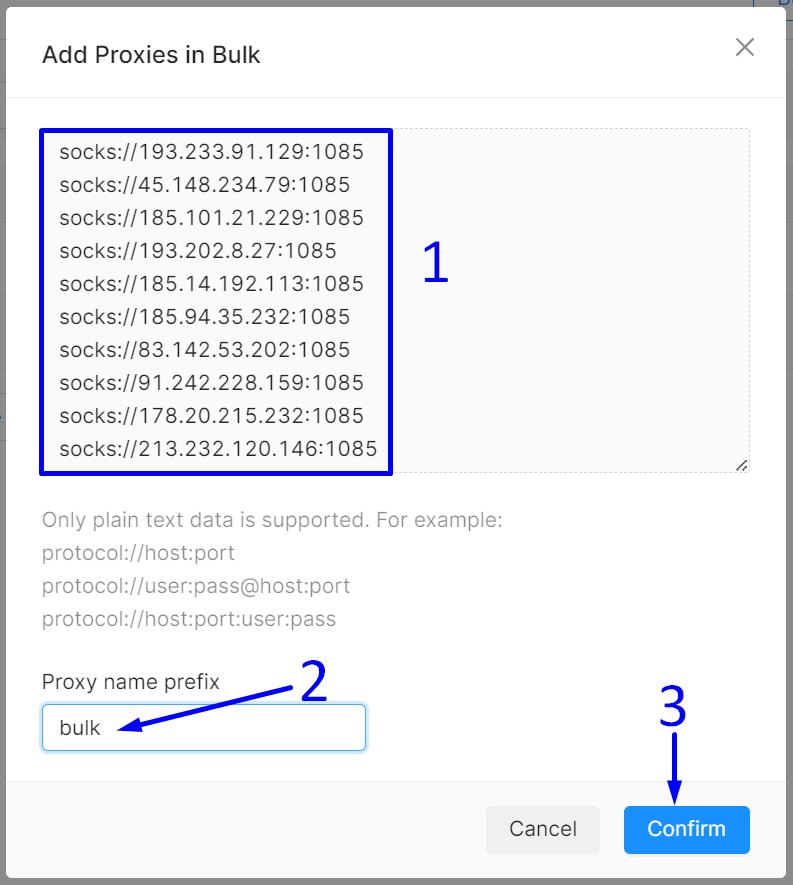
We prefer SOCKS and create a list of our proxies in a text editor in the following format:
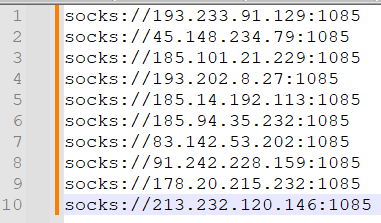
We copy the entire list and:
- Paste it into the Octo Browser proxy manager.
- Specify any prefix in the “Proxy name prefix” field to tag this group of proxies.
- Click the “Confirm” button.
Voilà! Our proxies are added and ready for action!