


You may need to configure a proxy server in the Edge browser for a number of reasons, including the fact that proxy servers are helpful tools for accessing websites and concealing online activity.
One typical reason is to browse websites anonymously, especially when traveling or visiting websites that might be blocked in some areas.
Proxy servers’ ability to conceal IP addresses and encrypt internet traffic makes them useful for increasing online privacy.
Moreover, proxy servers can enhance network speed and performance through the use of compression techniques, which can be very helpful for companies who are experiencing performance concerns. Moreover, proxy servers can be used to get through firewalls and content filters, which may be particularly helpful in institutions or nations where internet access is strictly controlled.
Steps to Set Up Proxies in Edge Browser
Attention. The Microsoft Edge browser does not have its own network settings, but uses system network settings. Enabling, changing, or disabling the use of proxies will therefore affect other browsers (e.g. Opera and Chrome) or any other programs that also use system network settings.
Install a HTTP/HTTPS Proxy in Edge
In this step-by-step tutorial, we’ll show you how to properly install an HTTP proxy in the Microsoft Edge browser.
- Open the browser settings menu by clicking on the three dots … in the upper right corner of the screen.
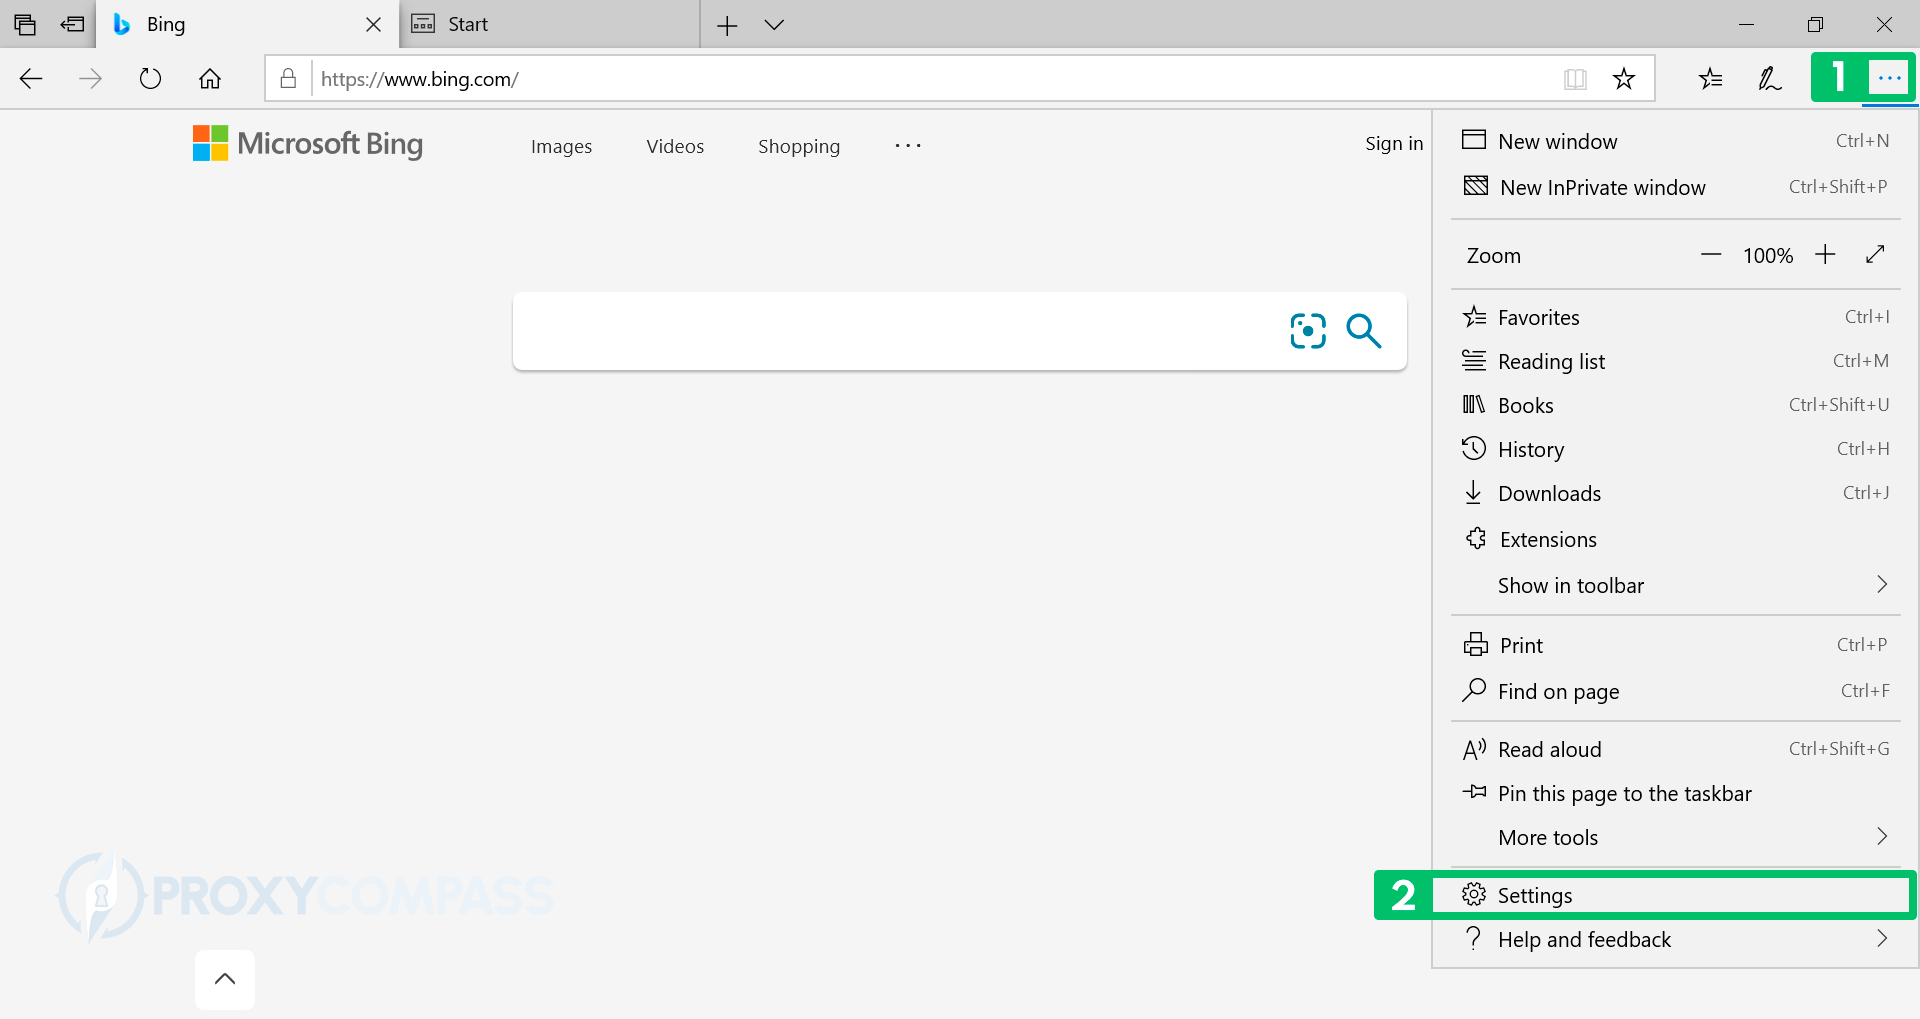
- Select “Settings” in the menu that appears.
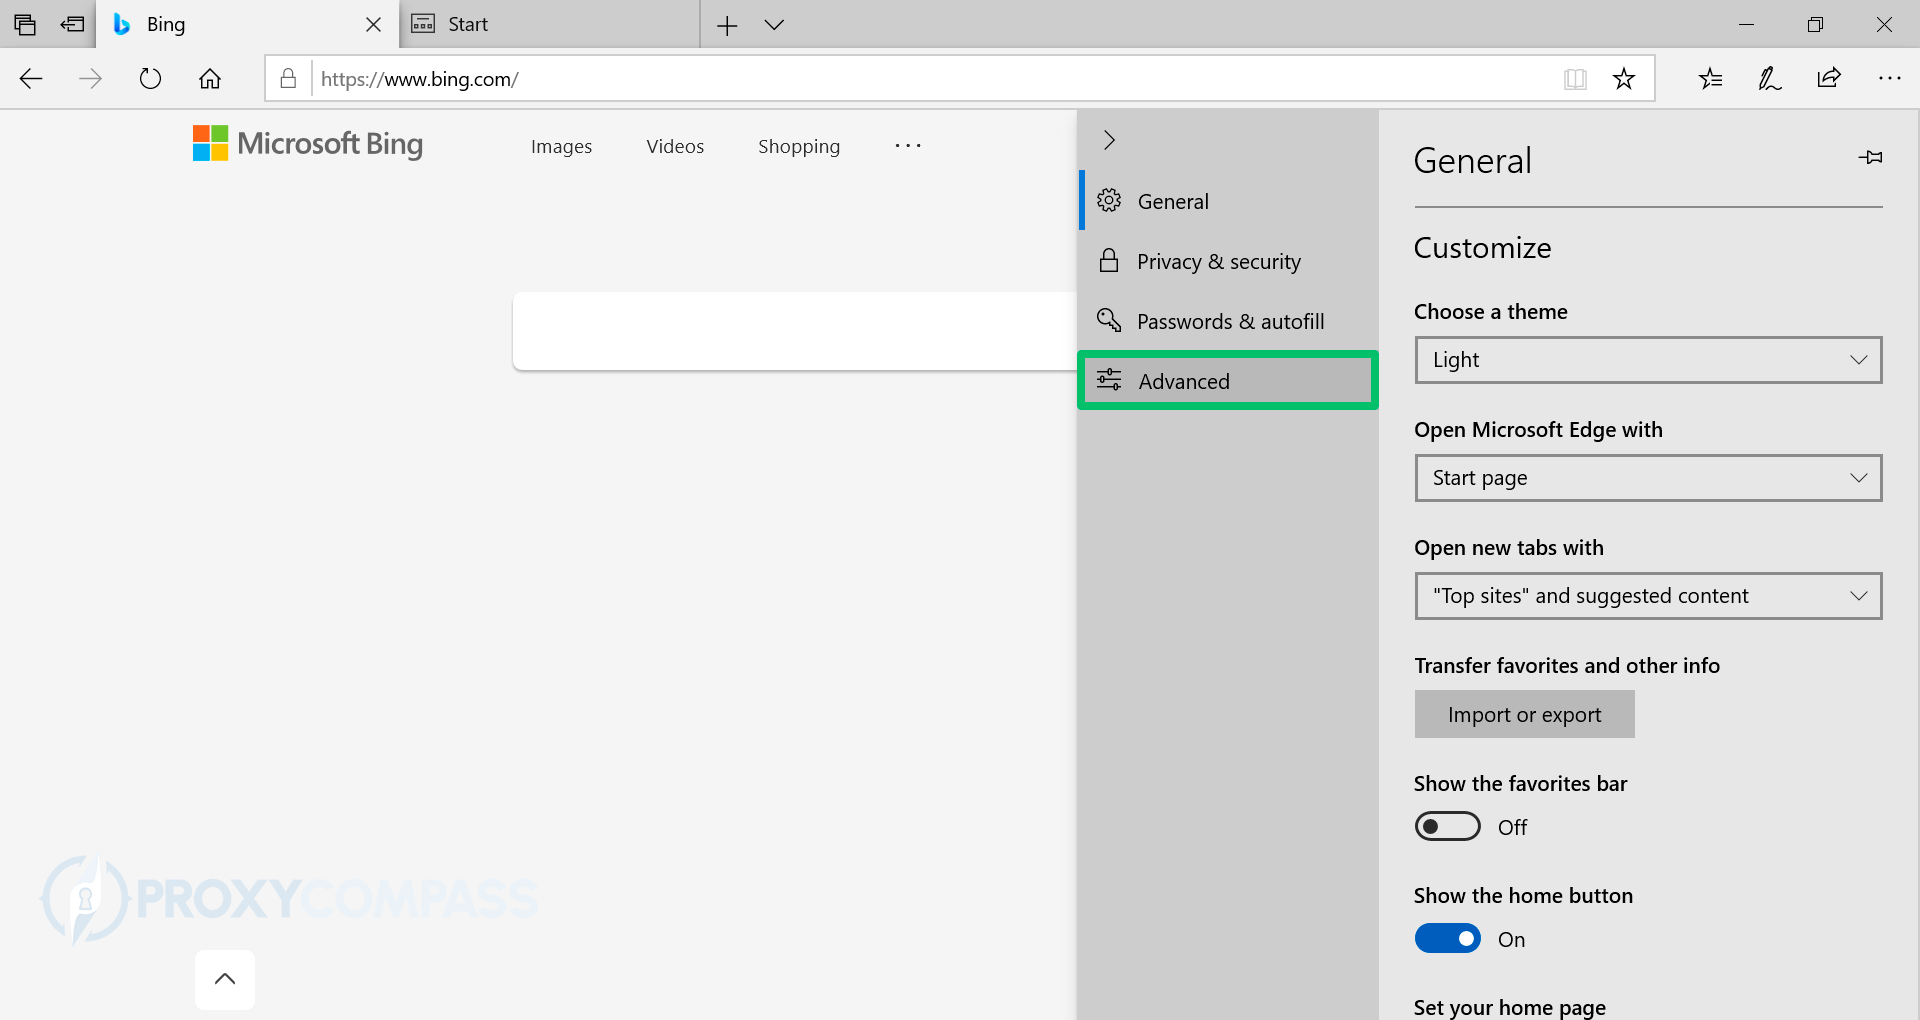
- On the left side of the menu, select “Advanced“.
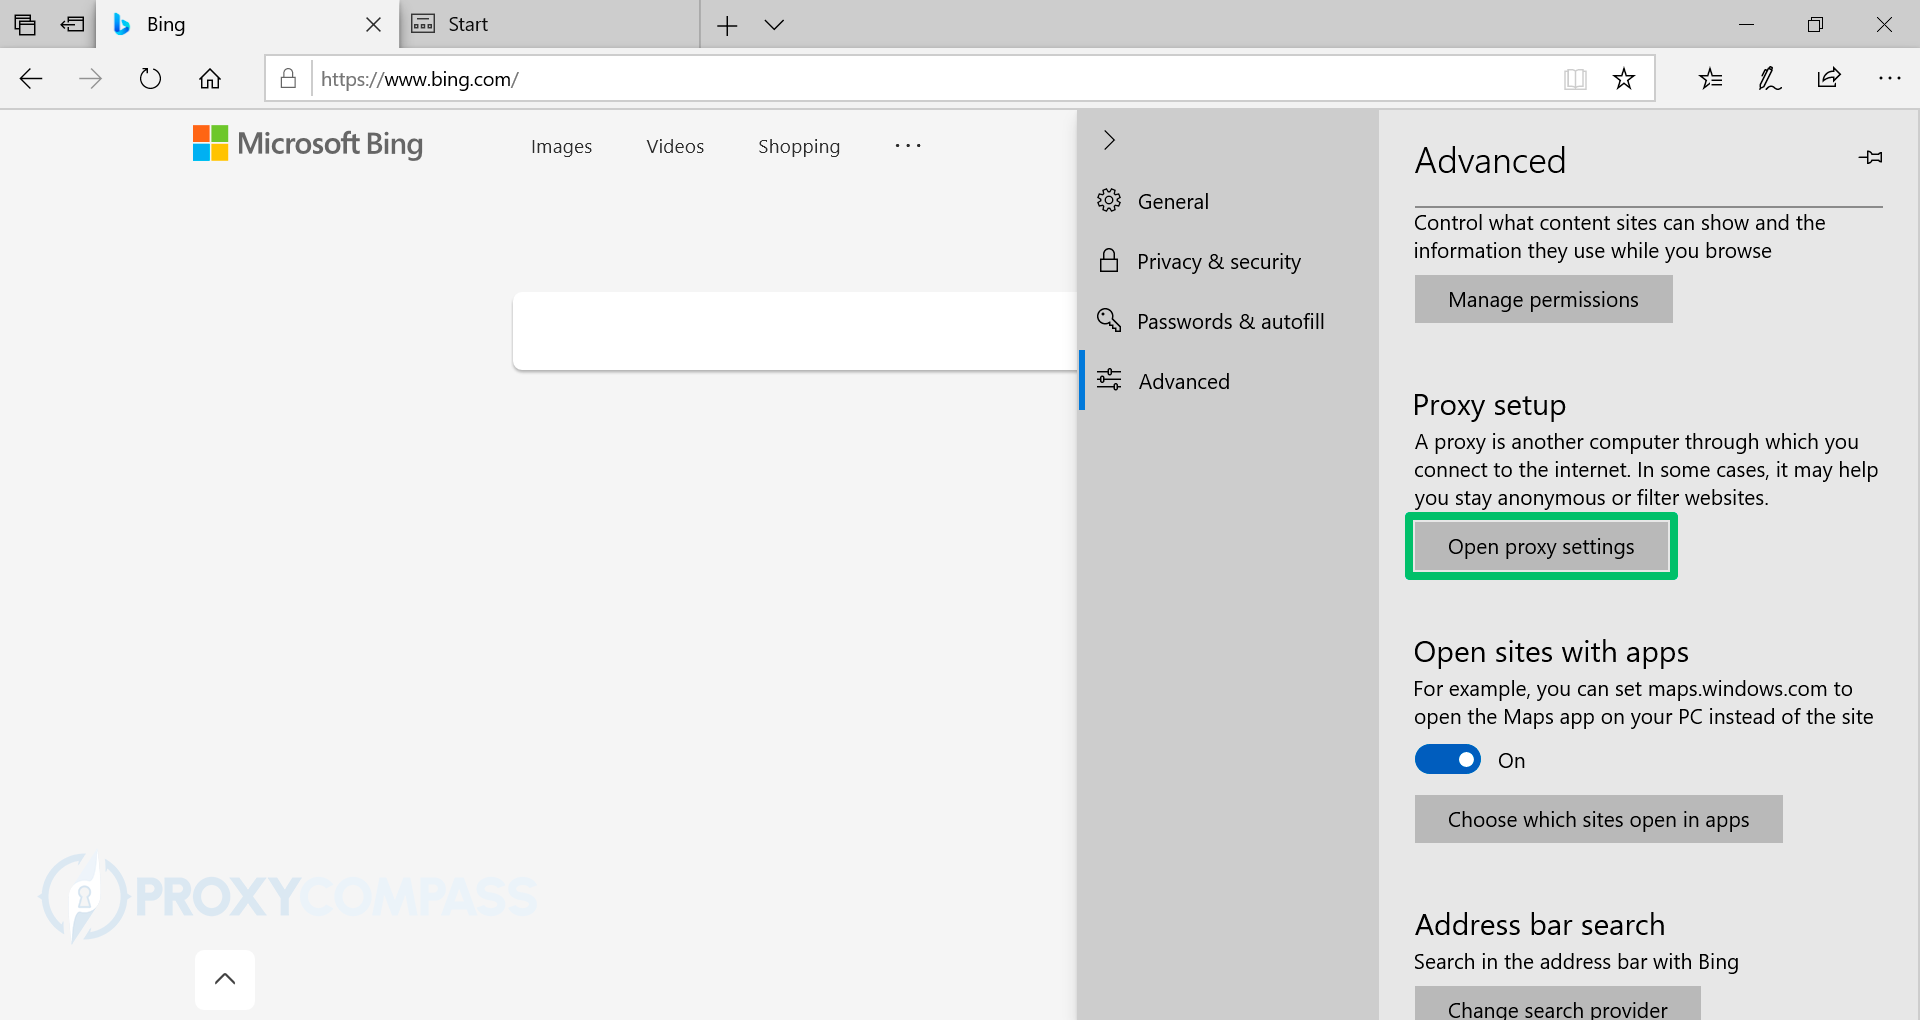
- In the “Proxy setup” area, click the “Open proxy settings” button.
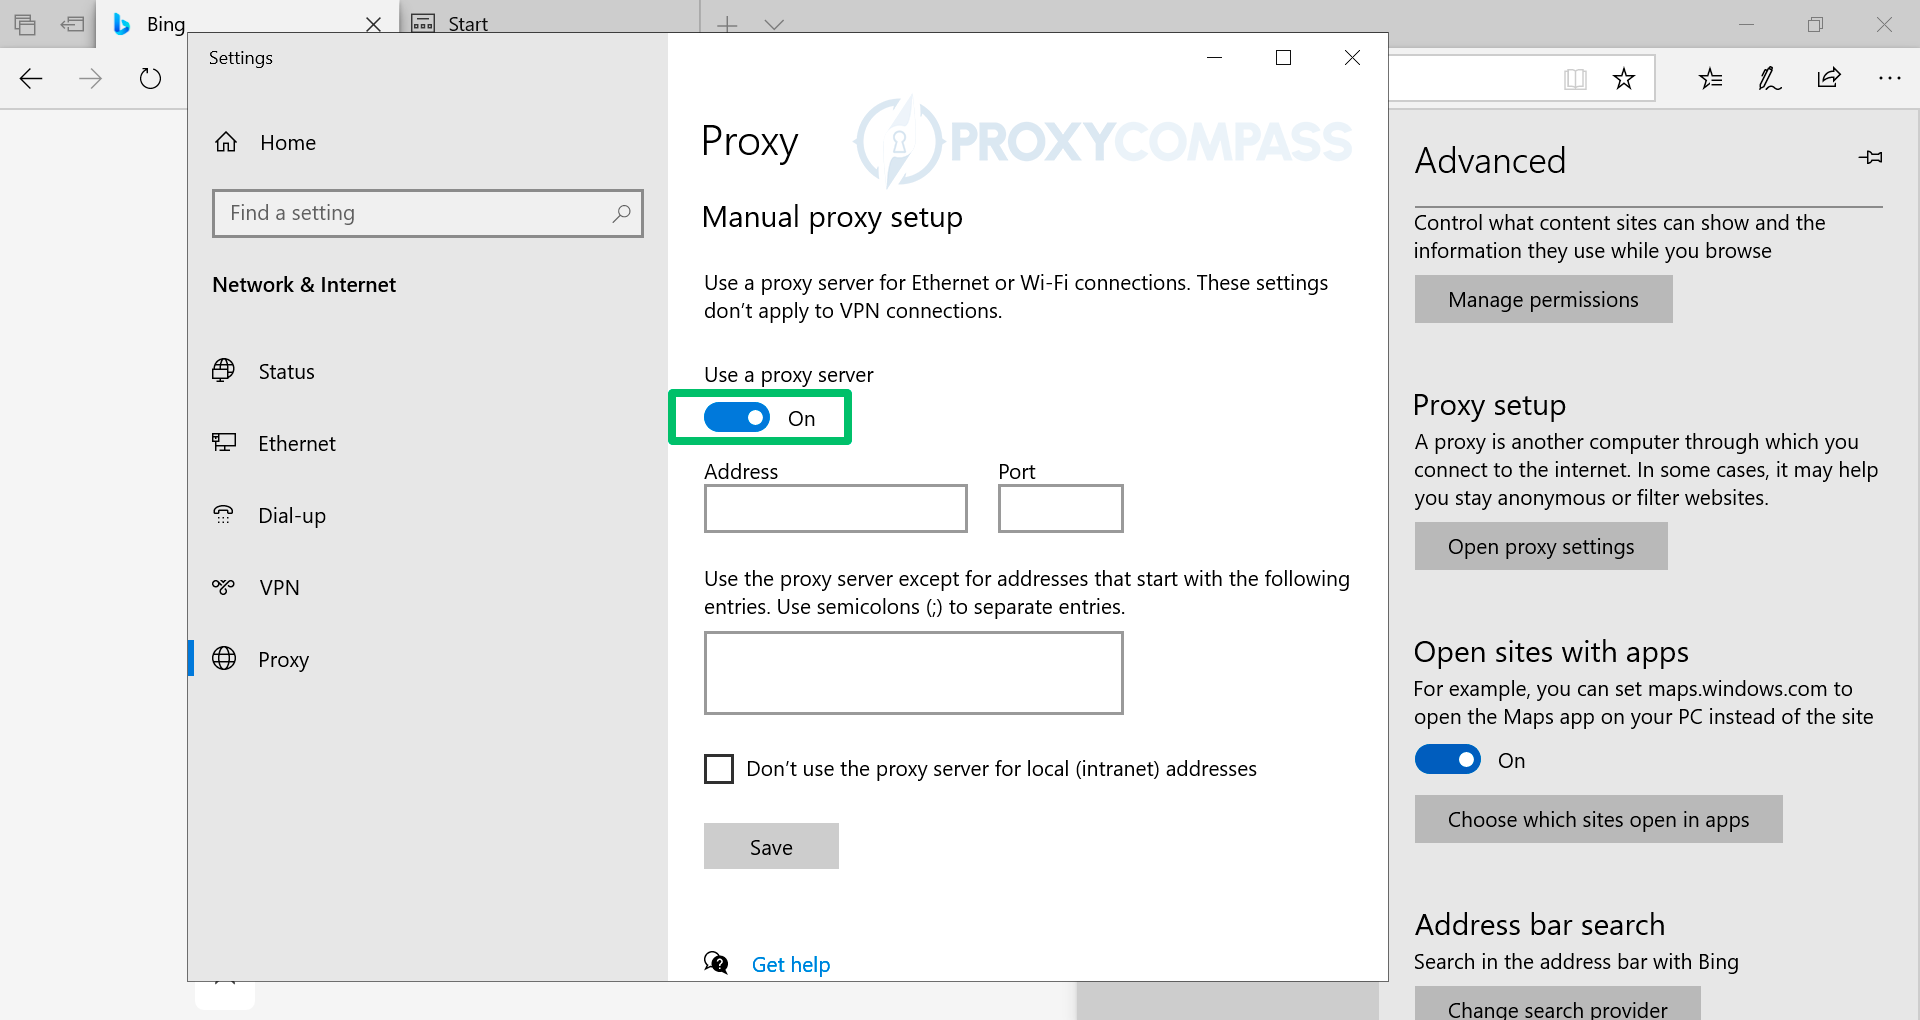
- In the displayed Windows system settings screen, in the “Proxy” section, under the “Manual proxy setup” subsection, move the “Use a proxy server” slider to the “On” position.
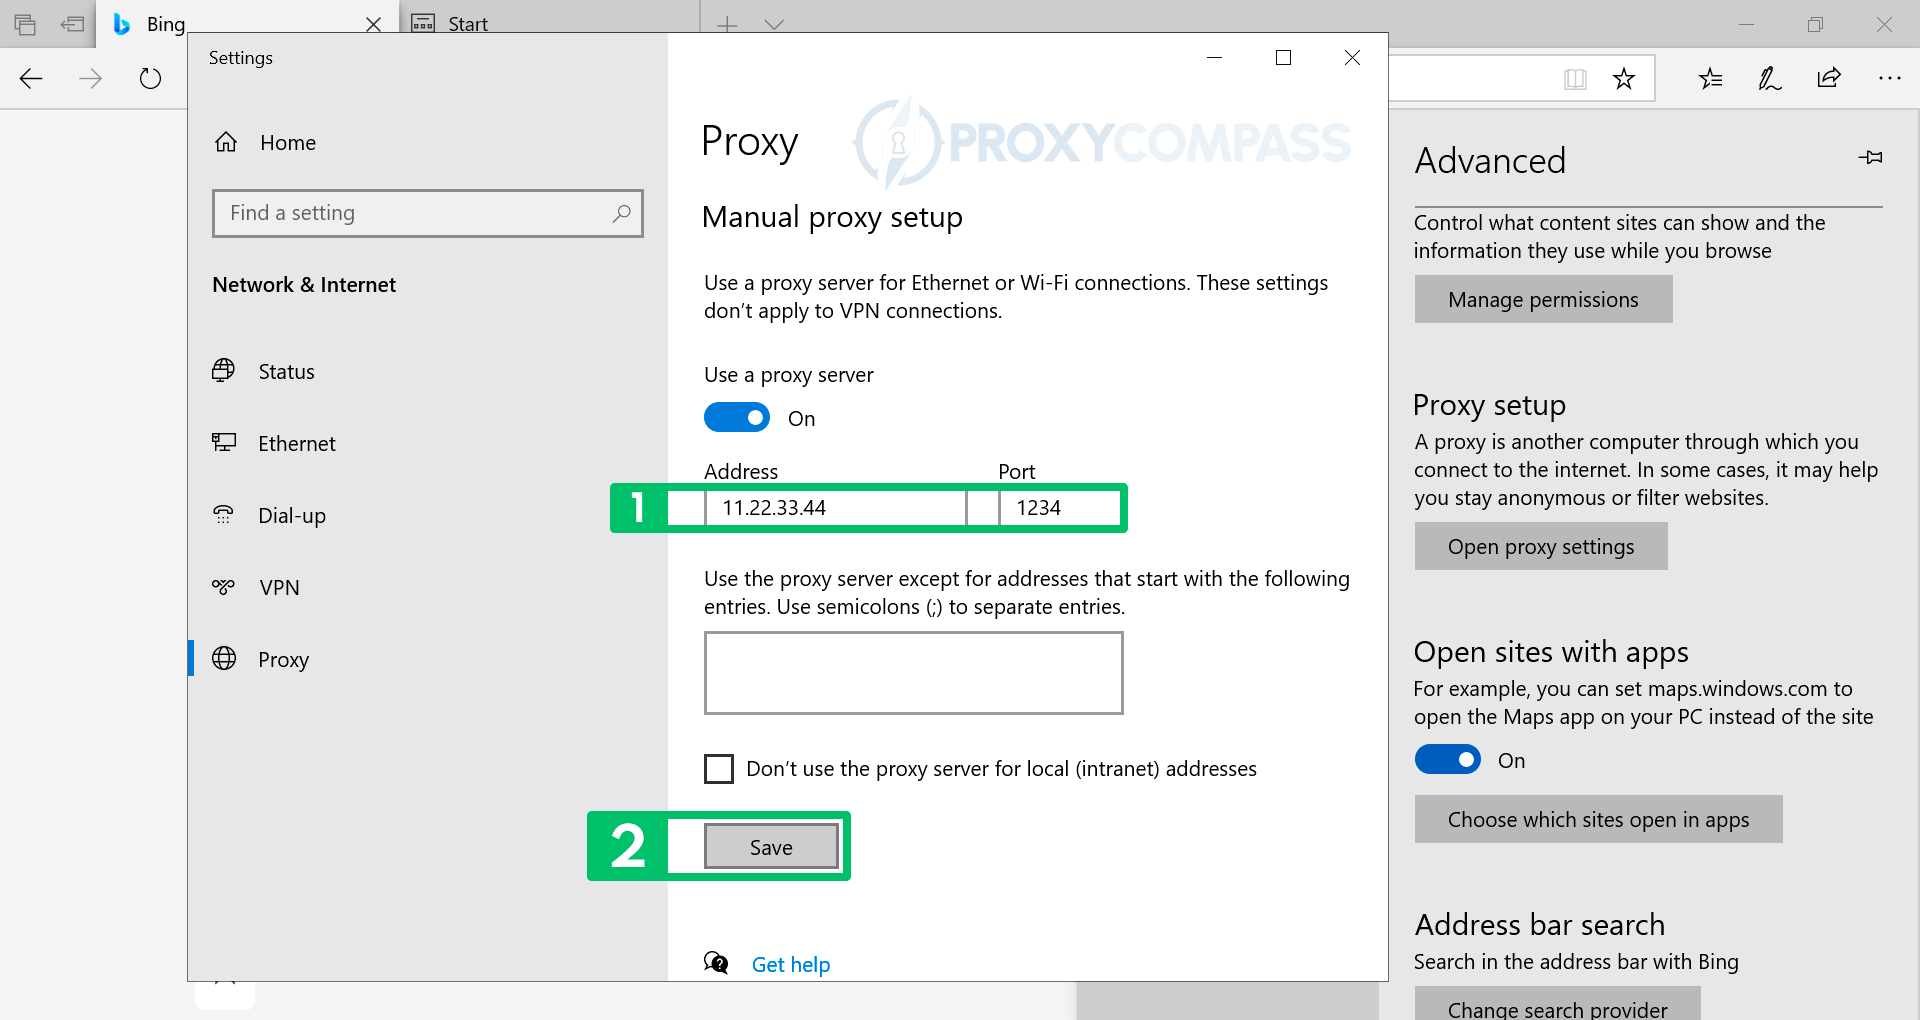
- In the “Address” and “Port” fields, enter the data received from the proxy provider, i.e. proxy IP address and port. Then save the changes by clicking the “Save” button.
You can check if the IP changes have taken effect by going to the IP Address Discovery page.
Setting up SOCKS Proxies in Edge
Unfortunately, Edge does not support SOCKS proxies. If you want to use SOCKS proxies in a browser, we recommend Mozilla Firefox or Tor browser. You can also use the Google Chrome browser with installed FoxyProxy addon.
Setting Different Proxies in Different Browsers at the Same Time
Quite often there is a problem of using different proxies in 2 or more browsers in parallel. It especially concerns the simultaneous use of different proxies in Edge and Chrome browsers. Below we show you how to set one proxy server for Edge browser and another proxy server for Chrome browser.
A special feature (or disadvantage) of both of these browsers (Chrome and Edge) is that they do not have their own network settings. Both browsers use Windows system settings. Thus, when you set a proxy server in one of the browsers, you automatically change the settings for the second browser as well.
You can solve this problem in different ways. We will list three of them.
- The first method. Use another browser instead of Chrome or Edge, such as Mozilla Firefox. This browser has its own network settings, separate from the network settings of the Windows operating system. If you install one proxy server in Firefox, you can easily install another proxy in Chrome or Edge. So you can use two different proxies in different browsers.
- The second method. Download and install the Foxyproxy Addon for Chrome. Foxyproxy will allow you to set up a separate proxy server for Chrome. At the same time you will be able to use another proxy server in Edge browser.
- The third, most advanced method. Use a stand-alone proxy program, such as Proxifier. With Proxifier, you can configure each individual browser to work with its own specific proxy server by simply setting up separate rules for each browser.
Disabling Proxies in Edge
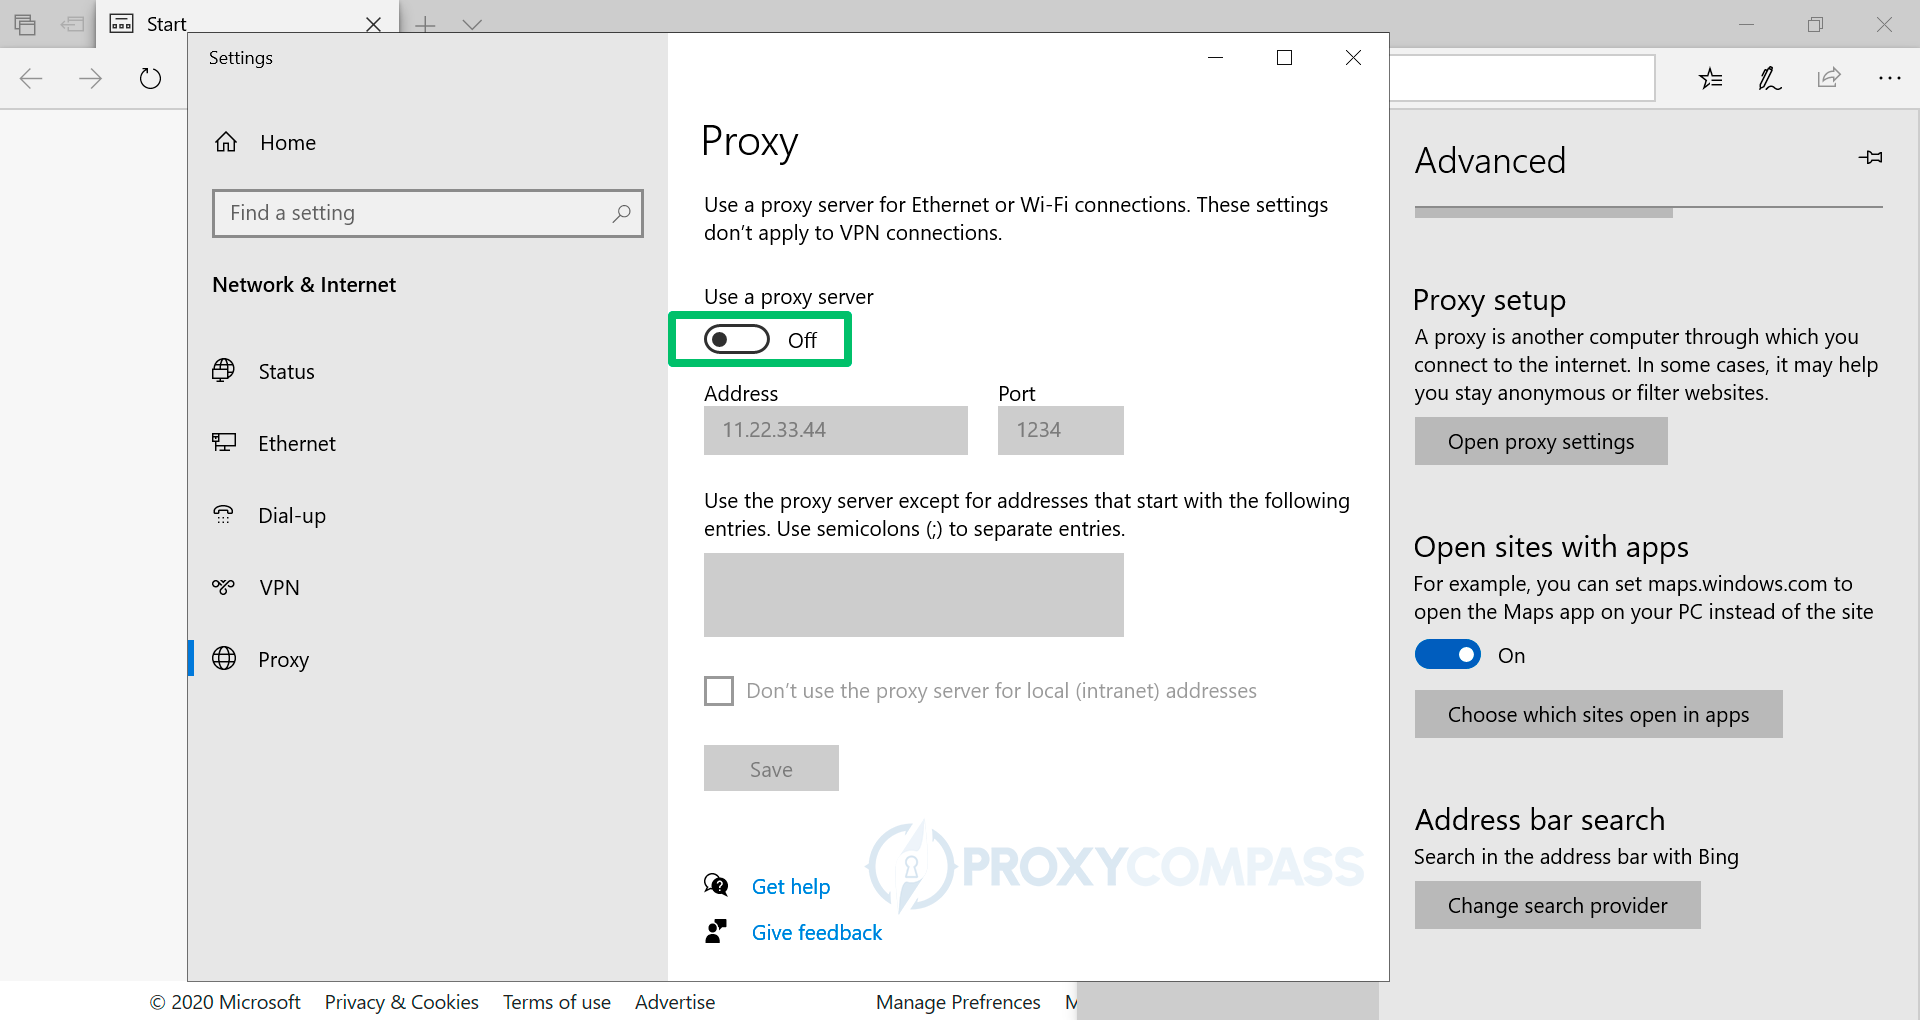
To completely disable proxies in Edge, you need to move the slider opposite the “Use a proxy server” inscription to the “Off” position.
You can check if the proxy server is no longer being used by going to the IP address discovery page.
Note that from this moment on, all connections to websites will be made from your real IP address, without the use of a proxy server.
In conclusion, setting up a HTTP proxy in Edge Browser is a simple process that can enhance your browsing experience by providing you with improved privacy and access to restricted websites. We have described in this guide the steps for setting up a proxy in Edge Browser, deactivating a proxy in Edge Browser, and using two separate proxy servers in Edge Browser and Chrome Browser. By following these steps, you can easily customize your browsing experience and ensure that your online activities are safe and secure. So go ahead and give it a try!
